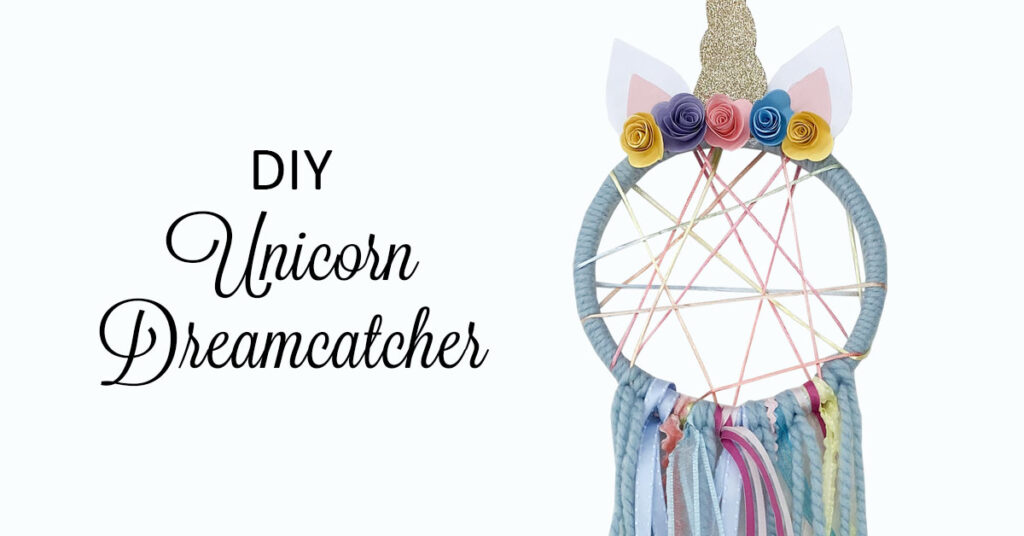
Make sure to invite the kids to help you make this adorable DIY Unicorn Dreamcatcher. Let them pick the colors for the ribbons, the yarn and the flowers. This way they’ll be able to match their new unicorn decoration to some of their favorite colors in their bedroom.
Supplies needed to make 1 Unicorn Dreamcatcher:
(Supplies may vary by store, however, special store-to-store orders can be placed with a one-week turnaround. Substitutions will be suggested if a product is no longer available.)

• Embroidery hoop (size of your choice)
• Yarn (your choice)
• Ribbon (your choice)
• String or thin ribbon
• Paper (your choice of about 5 colors)
• Glitter paper
• Hot glue gun & glue stick
• Die-Cut Machine Center:
– Ben Franklin Die J7 (in-store only) for unicorn ears and horn
– Ben Franklin Die Q20 (in-store only) for the flowers
Directions:
1. Visit our Die-Cut Machine Center and use dies J7 and Q20 to cut out the unicorn shapes and flowers Use the glitter paper for the unicorn horn.
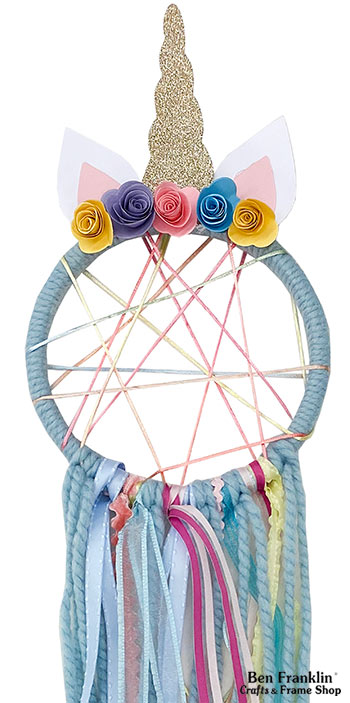
2. Wrap the yarn around the embroidery hoop until you cover about ¾ of the hoop.
3. Take your string (or thin ribbon) and wrap it sporadically across the embroidery hoop.
4. Cut the yarn and ribbon to the desired length then tie onto the embroidery hoop – covering the remaining ¼ of the embroidery hoop. (When you decide the length of the tail ends you want, double it because you will be folding it in half to tie onto the embroidery hoop).

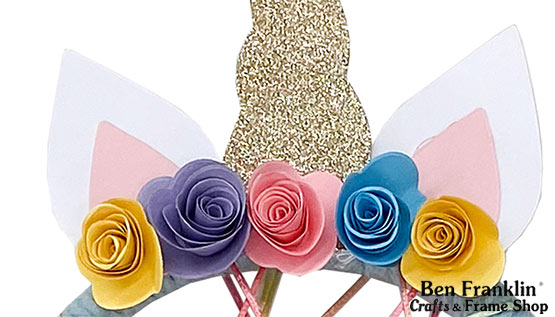
5. Glue the flowers onto the top of the embroidery hoop, on the front side.
6. Now glue the inner and outer unicorn ears together and then glue them behind the flowers on the backside of the embroidery hoop.
7. Finally, you’ll glue the unicorn horn in between the ears on the backside of the embroidery hoop as well.
It’s ready to hang!