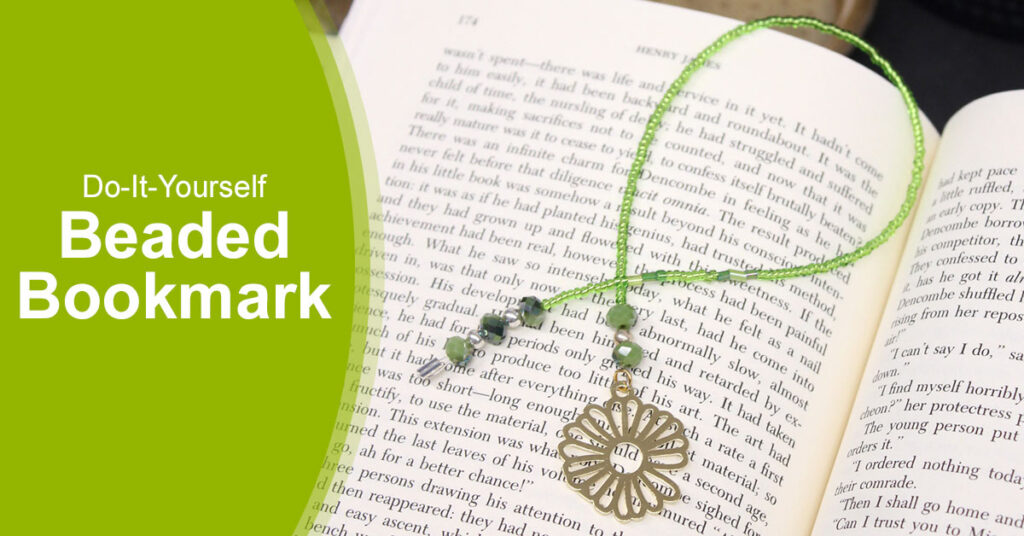
How to Make a Beaded Bookmark
Beaded bookmarks add a beautiful handmade touch to any book. They make wonderful gifts for teachers, friends, and neighbors, and they’re also great for selling at markets. This simple DIY tutorial will show you how to make a beaded bookmark using seed beads, Beadalon bead stringing wire, and a charm of your choice. You’ll have a stunning bookmark in no time!
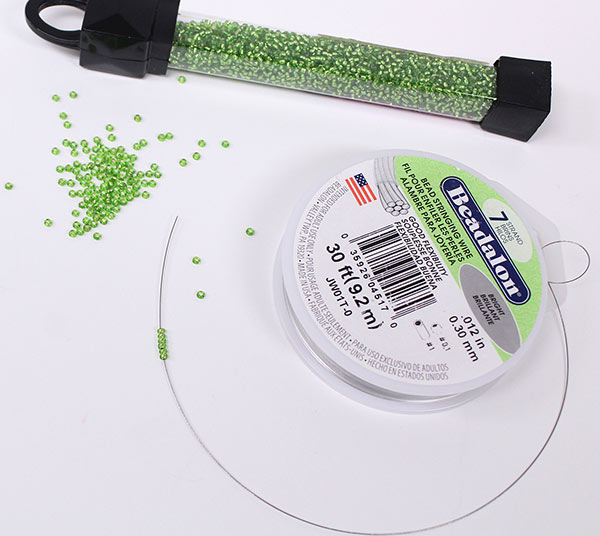
Supplies You’ll Need to Make a Beaded Bookmark:
– Beadalon bead stringing wire (about 12-14 inches per bookmark)
– Seed beads (choose colors you love!)
– A charm of your choice
– Jump rings (A jump ring is a small, metal ring with two distinct ends that’s used for attaching items).
– Crimp beads, 2 per bookmark (small beads with thin walls, made to be squashed and compacted into shape using crimping pliers, creating secure connections between wires and connectors)
– Crimping pliers
– Wire cutters
– Pliers
Step 1: Cut the Wire
Use wire cutters to cut a 12-14 inch piece of Beadalon bead stringing wire. If you want a longer bookmark, adjust the length accordingly.
Step 2: Secure the End
Slide a crimp bead onto the wire, then thread the wire back through it to create a small loop, leaving just enough space for movement. Use crimping pliers to flatten the crimp bead securely, then trim any excess wire. This will keep your beads in place as you start threading them onto the wire.
Step 3: String the Beads
Start threading seed beads onto the wire. Choose a color pattern or mix them up randomly for a unique look. Keep adding beads until you have about an inch left at the end of the wire.
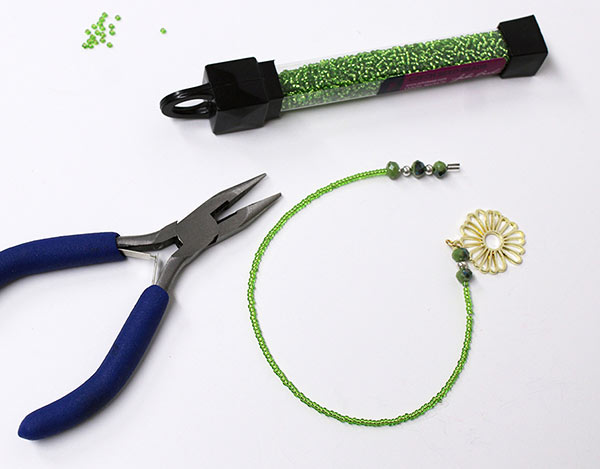
Step 4: Attach the Charm
Take the end of the wire and slide a crimp bead onto it. Next, thread the wire through the jump ring. Then, bring the wire back through the crimp bead to create a small loop around the jump ring. Use crimping pliers to flatten the crimp bead securely. Trim any excess wire close to the crimp bead.
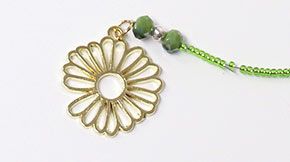
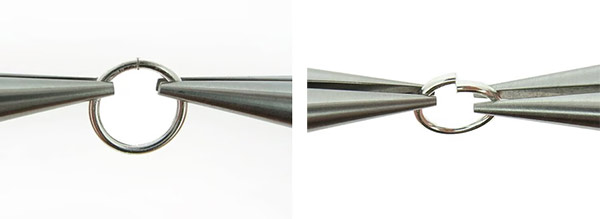
Step 5: How to Properly Open and Close Jump Rings
1. To attach the jump ring on the charm, you’ll use pliers to open the ring. (Remember to open the ring vertically, not horizontally – picture below)
2. Use two pairs of pliers to open a jump ring by twisting it away from you .
3. Attach the jump ring to the loop on your charm.
4. Close the jump ring by twisting it back towards you, letting the ends slide neatly next to each other.
By twisting instead of pulling, you’ll maintain the strength of the rings, keeping your charm securely attached!
Step 6: Test Your Bookmark
Hold the bookmark by the charm and let it dangle. Make sure the beads are secure and the wire isn’t too tight or too loose. Adjust if needed.
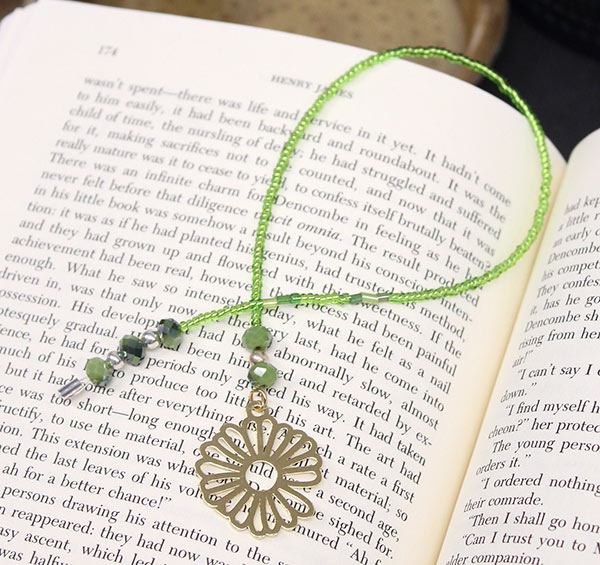
Enjoy or Gift It!
Your beaded bookmark is now ready to use or gift! These bookmarks make beautiful and thoughtful presents, and they’re a great item to sell at craft fairs or markets.
Now that you’ve mastered this design, experiment with different beads, charms, and wire lengths to create your own unique bookmarks.
Why Shop with Us?
Our Ben Franklin Crafts and Frame Shop stores in Bonney Lake and Monroe, WA are stocked with high-quality supplies, and our friendly staff is always ready to help you find exactly what you need. We hope that we were able to show you how to make a beaded bookmark with these easy steps. Don’t hesitate to stop by our store and ask our team questions that we may not have covered here.
Happy beading!

