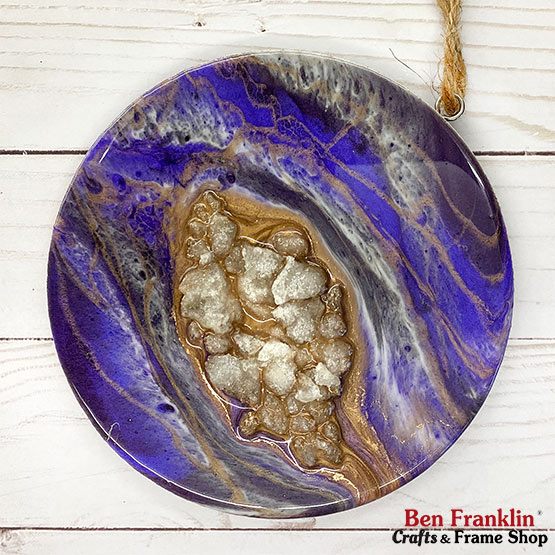

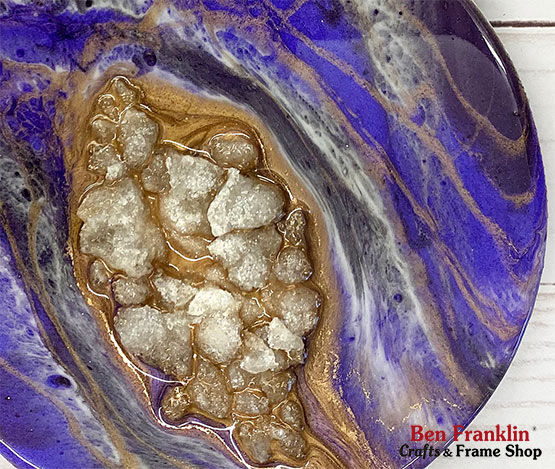

Today Grace will show you how easy it is to create a geode effect onto one of our wood surfaces using resin and a few other supplies. Don’t be scared! It looks intimidating when you look at the picture of our geode plaque below, but with the right supplies and by following Grace’s technique, you’ll be able to create your own “faux geode”! Don’t forget to let it sit for at least 24 hours for it to harden completely before you touch it.
Here’s a list of the supplies you’ll need to make your first resin geode plaque – (available at our Ben Franklin Crafts and Frame Shop stores in Bonney Lake & Monroe, WA – while supplies last):
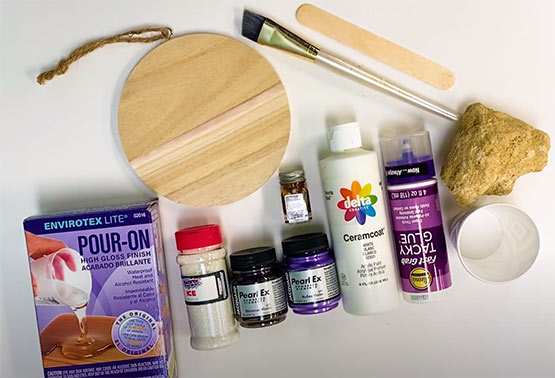
SUPPLIES:
– Envirotex Lite Pour-On High Gloss Finish Resin
– Glitter
– Pearl Ex Powder
– Enamel Gold Paint
– White Paint & Paint Brush
– Tacky Glue
– Geode Rock
– Round Wood Plaque with Hanger
– Heat Gun
– Paper Cup and Popsicle Stick
Grace’s instructions are available in the video below, or click here to go to our YouTube channel.
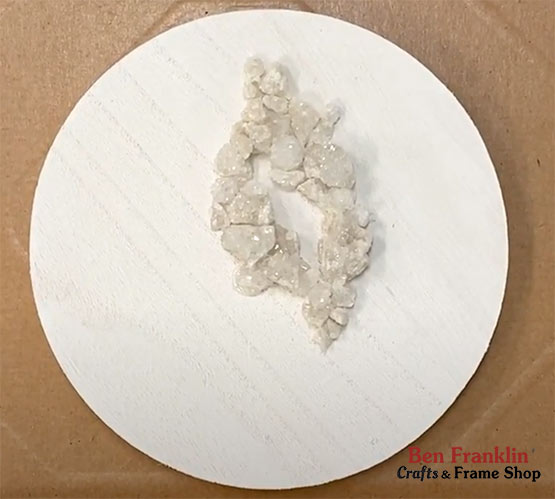
PREPARE YOUR SURFACE
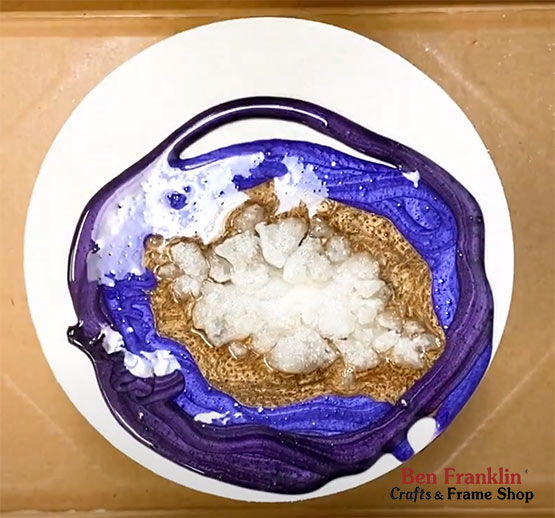
POUR YOUR RESIN
LET IT DRY 24 HOURS
Our step-by-step video tutorial is available on our YouTube Channel. CLICK HERE to watch.
If you have any questions, don’t hesitate to contact us! (phone numbers are below)

Huge savings offered throughout both our Bonney Lake and Monroe stores.