

Have you seen the Chenille-It strips before? It’s really fun to use! It allows you to make your own chenille! You just stitch it on your fabric project, wash it, dry and fluff! In today’s project that we called “Chenille-It Envelope Pillow”, we’ll show you how to add the Chenille-It strips to a pillowcase. The envelope pillowcase is really easy to make. Follow the easy step-by-step instructions below.
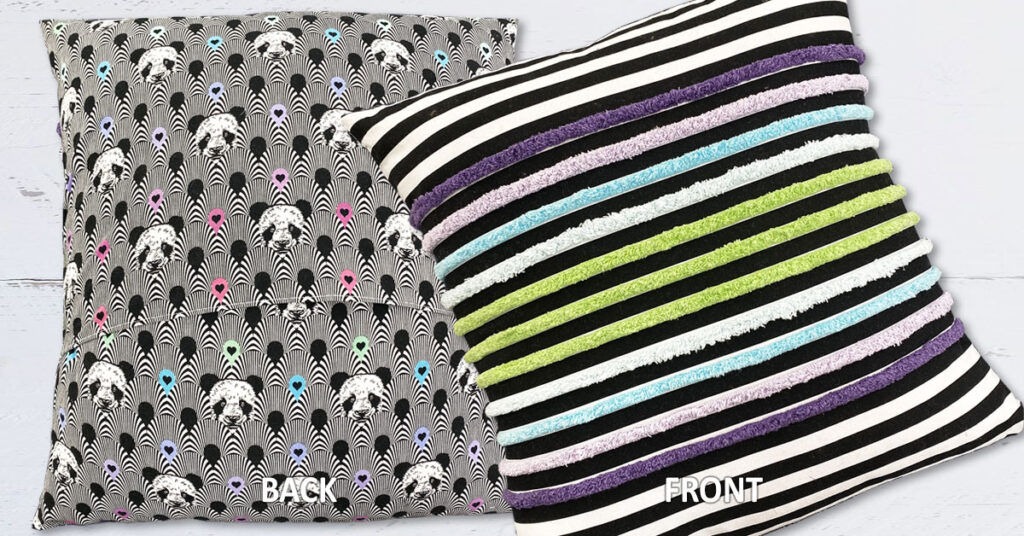
1 fat quarter for front of pillow (we used black and white stripe print)
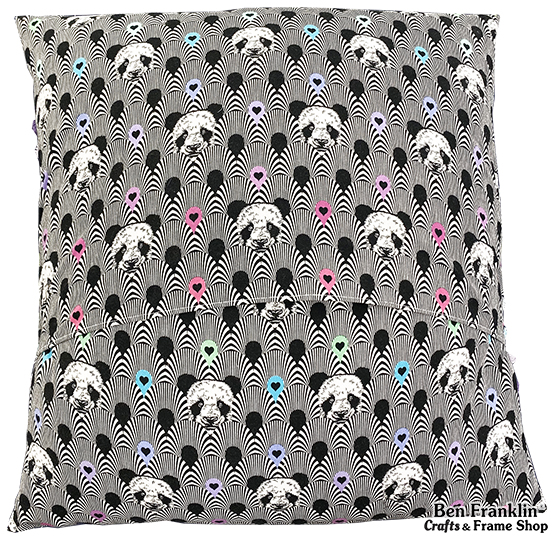
½ yd fabric for back of pillow (we used fabric from the Linework collection)
18” pillow insert
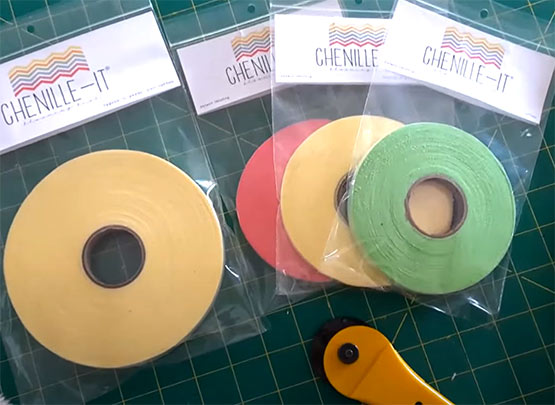
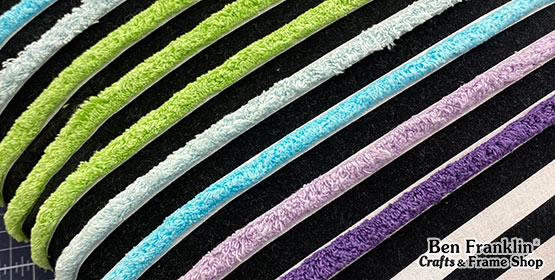
⅜” Chenille-It strips: We used 3yds purple, 3 yds lilac, 3yds Bahama blue, 3 yds pale blue, 4½ yds lime
green
Fabric glue pen (optional but helpful in stabilizing the Chenille-It)
Coordinating thread (colors optional for Chenille-It strips, once washed they’ll hardly be seen)
Sewing Machine
(Supplies may vary by store, however, special store-to-store orders can be placed with a one-week turnaround. Substitutions will be suggested if a product is no longer available.)
1. Wash and press the fabric but not the Chenille-It. Note: Don’t skip this step!
2. Cut your front focus fabric to 18”x18”.
3. Cut 2 pieces for the back side 14”x18”. If you’re using directional fabric, make sure to align the print accordingly.
4. Fold the bottom edge of your top back piece over about ¼”, press and repeat. Topstitch along the edge to create a finished edge. Repeat for the top edge of the bottom back piece.
5. Prior to assembling your pillow, apply the Chenille-It strips to the front side. Start in the center and begin adding Chenille-It strips onto the white stripes and sew in place down the center of the strips. Note: to help stabilize the Chenille-It, you can use a fabric glue stick (we used the Sewline Fabric Glue Pen)
6. Wash and dry your front focus fabric with the Chenille-It on it. This will create the chenille look & feel. Note: Helpful to press after drying, avoiding pressing over the loft of the Chenille-It.
7. Assemble the envelope pillow by placing your front fabric right side up (facing desired direction).
8. Place the first back piece right side down, aligning the corners towards the bottom with the front fabric.
9. Add the second back piece right side down aligning the corners towards the top of the front fabric. The top piece should overlap the bottom piece from step 8.
10. Pin in place all the way around. Sew around your pillow with at least a ⅜” seam and remember to backstitch at the beginning and end.
12. Clip the corners and turn right-side out. Enjoy!

Huge savings offered throughout both our Bonney Lake and Monroe stores.