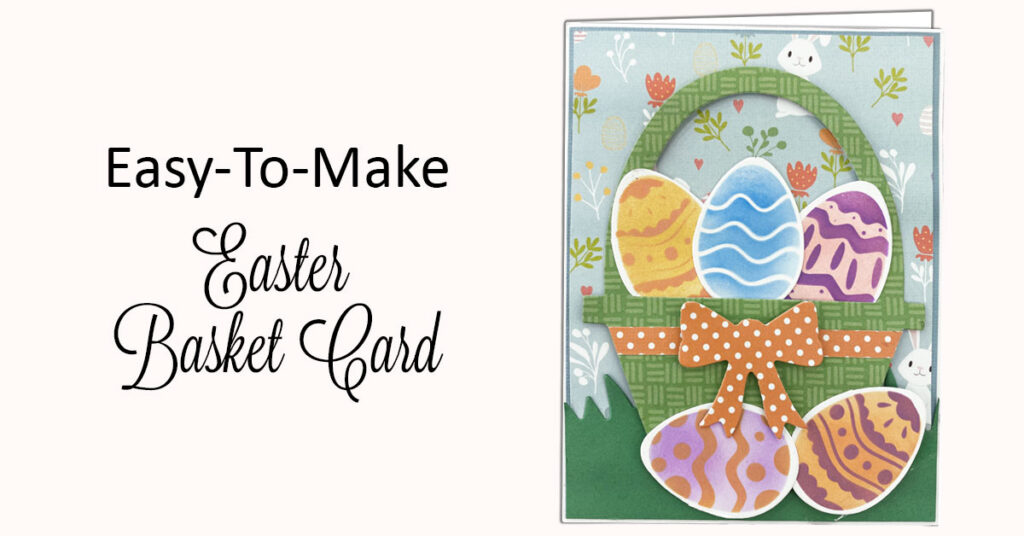
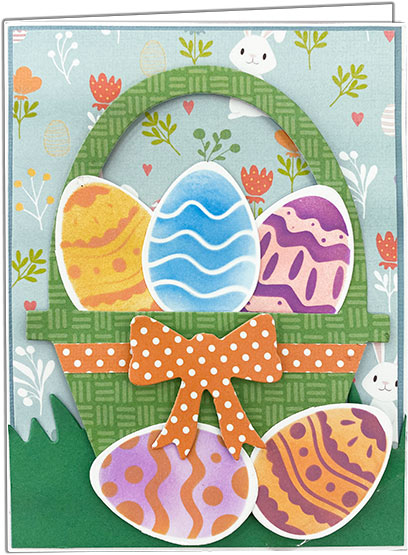
Come in to cut all the pieces you need to make this Easter Basket Card. You have FREE access to our Die-Cut Center when used with supplies bought in our store. Scroll down to follow Melanie in her video tutorial for step-by-step instructions on how to put this card together.
Supplies needed to make an Easter Basket Card
(Supplies may vary by store, however, special store-to-store orders can be placed with a one-week turnaround. Substitutions will be suggested if a product is no longer available.)

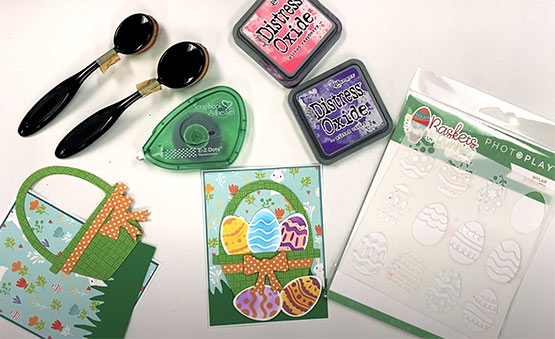
• Assorted colors of Distress Oxide Ink Pads
• Picket Fence blender brushes
• Removable tape
• Photo Play egg stencil
• Favorite adhesive
• Green paper for grass
• White card (4¼”x5½” already folded)
• Orange polka dot paper for bow and ribbon
• Green patterned paper for basket
• DSP for background (Designer Series Paper)
• Solid color paper for outer border
• White paper for the eggs
• Following dies from our Die-Cut Center:
– #550: Basket & eggs
– #G2: Grass
– #42: Bow
Directions:
Watch the video for step-by-step instructions. Click HERE.
1. Cut the DSP background paper to 4” x 5¼”.
2. Cut ¼” x 4” strip from the orange polka dot paper.
3. Cut the solid color paper to 4⅛” x 5⅝”.
4. Use our Die-Cut Machine Center to cut out the following shapes: #550 for the basket & eggs (use green patterned paper for basket and white paper for eggs – as many eggs as desired), #G2 for the grass (use green paper at least 4⅛” long) and #42 for the bow (same orange polka dot paper to match the ribbon).
5. Glue the DSP paper on top of the solid color paper (center it so the solid color creates an even border).
6. Glue the front of your white card to the back of the solid color paper so it’s attached to the card itself.
7. Glue the grass piece across the bottom.
8. Glue the ¼” strip on top of the basket, below the handles. Cut off the overlap at the ends.
9. Glue only the bottom of the basket to the card. Leave the top alone for now to give you a chance to position your eggs behind.
10. Attach the removable tape to the back of all the eggs and stick them on a scrap piece of paper to keep them in place while you decorate them. Use the stencil, blender brushes and Distress Oxides to add the designs you like. *Tip: tape down the stencil so it stays in place as you decorate. Watch the video for step-by-step instructions. Click HERE.

11. Once finished, you can rub the removable tape off of the backs of the eggs.
12. Add glue/tape to the eggs and place them around your card, both inside the basket and outside. Once finished, you can glue the basket handle down to the card.
13. Glue the bow to the basket strip.
14. Add a special message inside and send to your friends and family!
