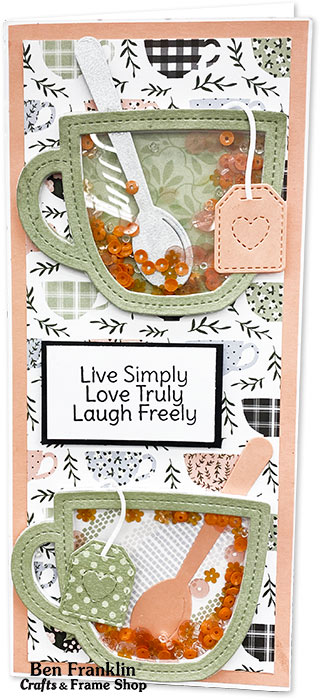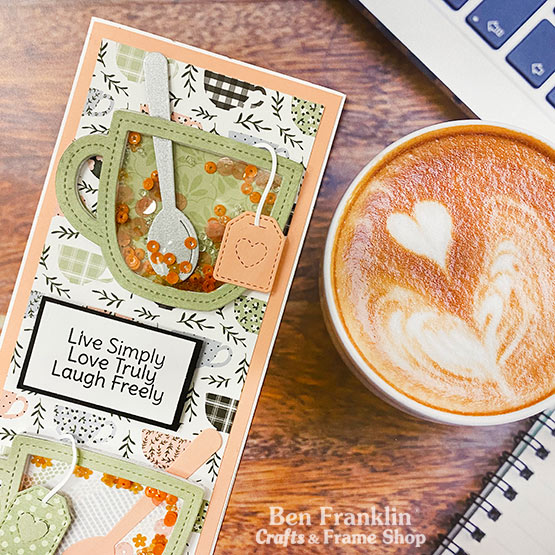
Are you wondering how to make this Tea Cup Shaker Card? With all the right tools and these step-by-step instructions, you’ll be able to make this card for all your friends and co-workers! This card is so adorable. Melanie will show you in this tutorial (which includes a video) exactly how to make it.
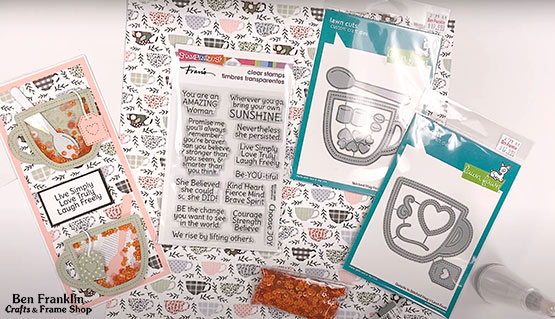
Supplies needed to make a Tea Cup Shaker Card:
(Supplies may vary by store, however, special store-to-store orders can be placed with a one-week turnaround. Substitutions will be suggested if a product is no longer available.)

1 sheet DSP (Designer Series Paper) of Echo Park’s “Coffee & Friends” paper collection
1 sheet of green DSP of your choice (for mugs)
1 sheet of peach cardstock paper
1 sheet of white cardstock paper
1 sheet of grey cardstock paper (for spoons)
Stampendous “Amazing Woman” clear stamp set for sentiments
Lawn Fawn die set: Outside In Stitched Mug (#LF2444)
Lawn Fawn die set: Stitched Mug Frame (#LF2445)
1 sheet of Acetate
EK Tools Powder Tool
Sequins & seed beads for shaker
Revolution At-Home Die-Cut Machine
Burnishing tool
Scoreboard and paper cutter
Directions:
Watch the video for step-by-step instructions. Click HERE.
1. Cut the following: DSP paper to 3¼” x 8”, peach cardstock to 3⅝” x 8⅜”, and white cardstock to 8½” x 7½”. Save the scraps for the sentiments and tea cup layers.
2. Using the DSP scraps, die cut 2 tea cups using die #LF2444. These will be the backgrounds.
3. Use the white cardstock scraps to die cut 14-16 layers using die #LF2445.
4. Die cut 2 green DSP mug frames using die #LF2445.
5. Die cut 2 spoons from the grey sheet – you can also use the peach scraps using die #LF2445.
6. Die cut 2 tea bags and heart embellishments from the green and peach scraps using die #LF2444.
7. Die cut 2 tea bag strings from the white scraps using die #LF2444.
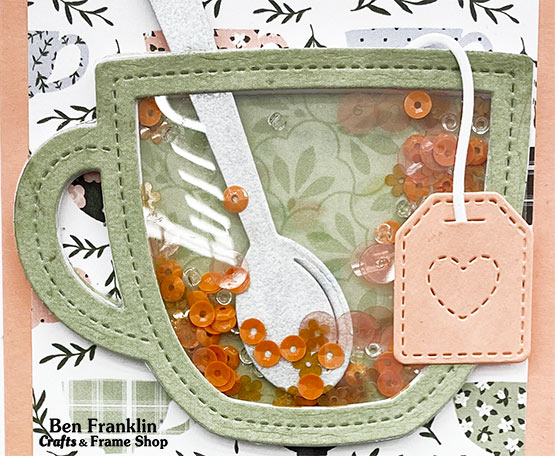
8. Cut the acetate sheet to 3½” x 7” and use it to die cut 2 mugs using die #LF2444. Then cut off the handles.
9. Make the slimline card by placing the 8½” x 7½” white cardstock onto your scoreboard. On the short side, score at 3¾”. Fold it in half and burnish.
10. Glue the peach paper to the front of the slimline card. Then glue the DSP background mugs (from step 2) on top of the peach layer.
11. Glue 7-8 layers of the white stitched mug frames together (from step 3) for one mug. Do the same for the second mug. It’s an option to glue the spoon behind or on top of the white layers – depends on how far back you want the spoons to be. Watch the video.
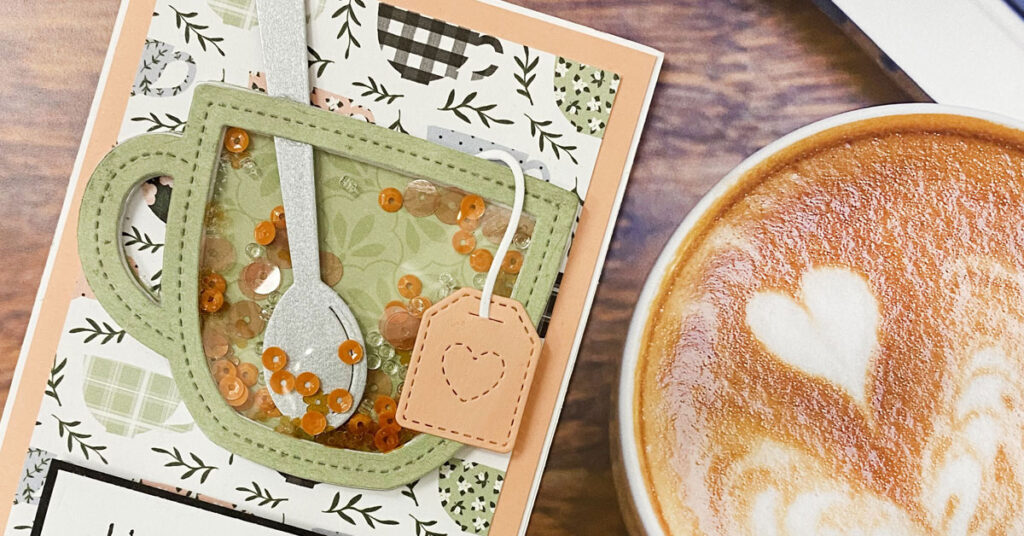
12. Glue the white mug frames on top of the tea cup backgrounds. Use the powder tool on the inside of the mug frames. This will prevent the sequins/beads from sticking.
13. Add sequins and seed beads. Be careful not to overfill or they won’t shake.
14. Glue the top layer of the tea cup frame (from step 4) to the acetate (from step 8). Let dry, then glue to the front of the white tea cup frames.
15. Add the tea bags and strings.
16. Stamp your favorite sentiments on white scraps, trim, add onto your card, and enjoy!