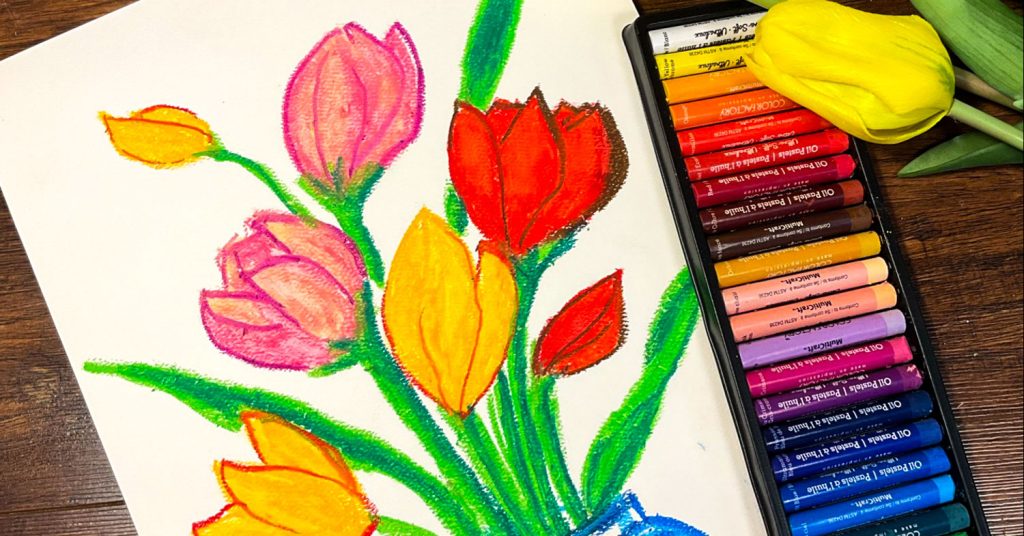
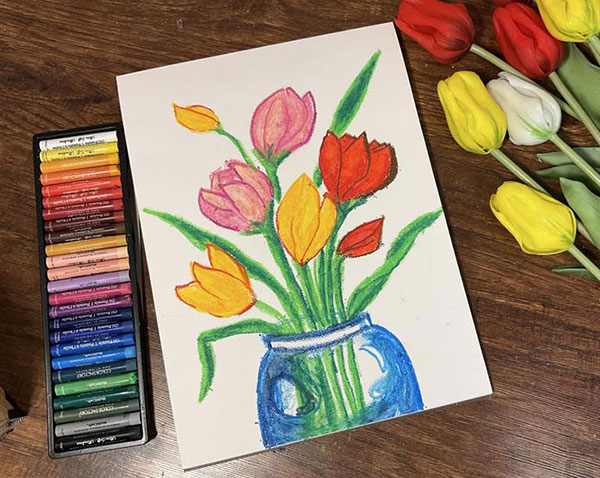
Learn how to draw bright tulips using simple shapes, layering & blending techniques.
If you’ve been wanting to create artwork using oil pastel without the mess of traditional paints, this beginner-friendly tulip project is a great place to start. Below, you’ll find a simple step-by-step written guide along with a video tutorial to see the process in action.

(Supplies may vary by store, however, special store-to-store orders can be placed with a one-week turnaround. Substitutions will be suggested if a product is no longer available.)
Why Try Oil Pastel Art?
Oil pastels give you that bold, painted feel without the mess of water cups or brushes. Because oil pastels stay soft, you can layer colors and blend them directly on the paper with your finger or blending tool. That makes them ideal for learning about highlights, shadows, and dimension without feeling overwhelmed.
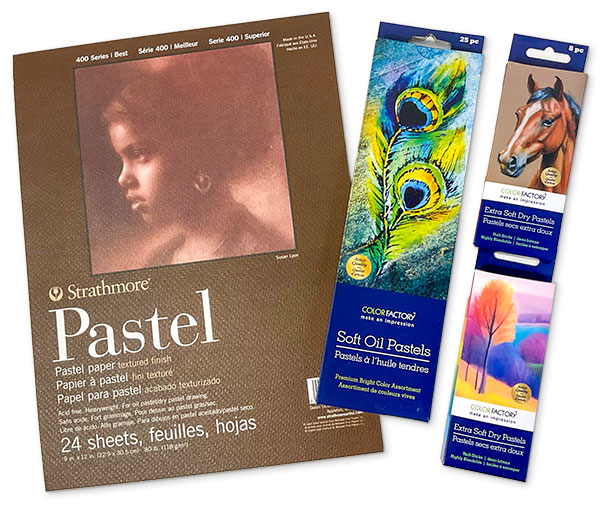
Supplies You'll Need to Get Started
You only need a few basic materials:
- Heavy pastel paper
- A soft oil pastel set (softer pastels blend more easily)
- Optional: blending tool
- Optional: Fixative spray to protect your finished artwork
Softer oil pastels glide smoothly and allow you to build rich color with light pressure. If you’re not sure which set to choose, we’re always happy to help you compare options in-store and find what works best for your project.
Video: How to Color with Oil Pastels
We recorded the process so you can follow along step by step and watch how the colors build from dark to light. Watch the video here.
Step-By-Step Instructions
Step 1: Sketch Simple Tulip Shapes
Start by lightly drawing basic shapes for your tulips. Think ovals and teardrops for petals, with long curved lines for stems and leaves.
Keep it loose. Oil pastels are forgiving, so there’s no need for detailed outlines. Simple shapes make blending much easier later.
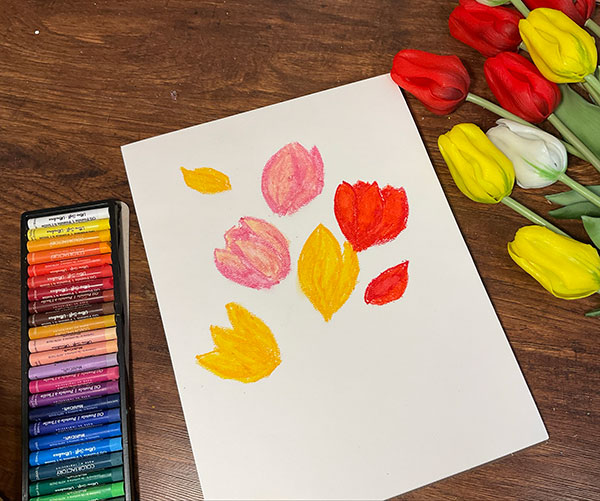
Step 2: Add Shadows for Depth
Choose a slightly darker shade of your flower color and add it where petals overlap or curve inward. This introduces dimension right away.
When learning oil pastel techniques for beginners, thinking about light and shadow is more important than perfect lines. Ask yourself: Where would the light naturally hit? Where would shadows fall?
Step 3: Layer Highlights
Now add a lighter color to areas where light touches the petals. This could be:
- A soft pink over red
- Yellow over orange
- A touch of white for brightness
Gently layer the lighter shade over part of your darker base.
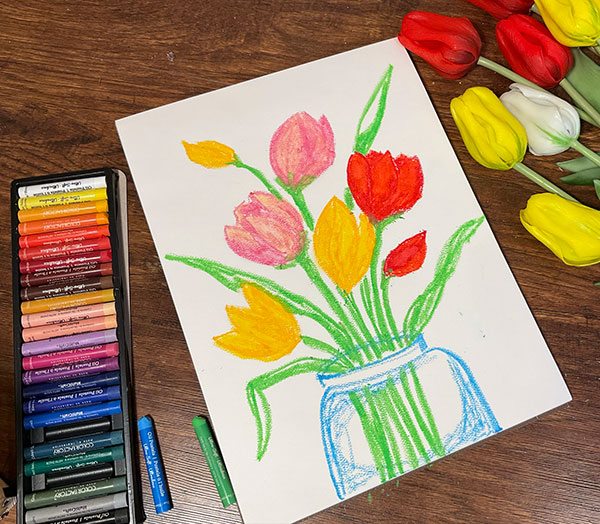
Step 4: Blend for a Soft, Painted Effect
Here’s where oil pastels really shine. Add a middle tone between your dark and light areas, then blend using your finger or a blending tool.
Small circular motions work beautifully. You’ll see the colors begin to melt together, creating that soft, painterly look that makes oil pastel art so satisfying.
Repeat the same layering and blending technique for the green stems and leaves.
Oil Pastel Blending Tips for Beginners
If you’re new to oil pastel art, keep these tips in mind:
- Work from dark to light.
- Use light pressure at first – you can always add more color.
- Blend small areas at a time.
- Wipe your finger between colors to avoid muddying.
The more you layer, the richer your drawing will look.
Finishing Your Oil Pastel Artwork
Because oil pastels never fully dry, your artwork can smudge. Once finished, spray a fixative over your piece in a well-ventilated area to help protect those vibrant colors.
And if you’d like to preserve your tulip artwork long-term, custom framing is a wonderful option. Proper framing helps protect pastel pieces from smudging and keeps them looking beautiful for years to come. Stop by our Frame Shop for a free consultation.
Ready to Try It?
Oil pastels are perfect for florals, landscapes, still life, and even abstract pieces. Once you get comfortable with layering and blending, the possibilities are endless.
If you need oil pastels, pastel paper, or fixative spray, stop by and see us – we’re always happy to help you get started on your next creative project. Grab your favorite colors and enjoy creating something bright and beautiful. 🌷✨
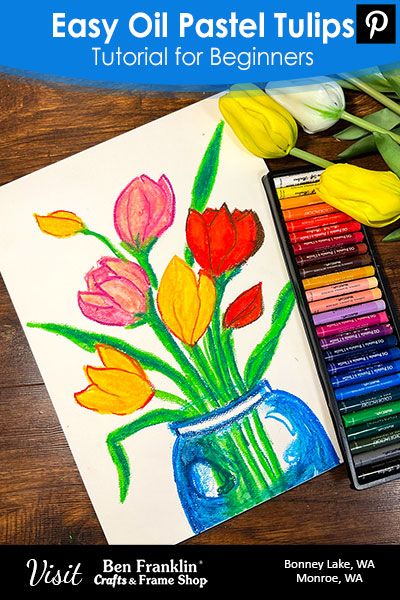
📌 PIN IT!
Don’t forget to save this blog post for later by pinning it to your Pinterest board!
🌟 Visit Us to Get Started!
Ready to start crafting? Visit Ben Franklin Crafts & Frame Shop in Bonney Lake or Monroe, WA, to find everything you need. Products may vary.