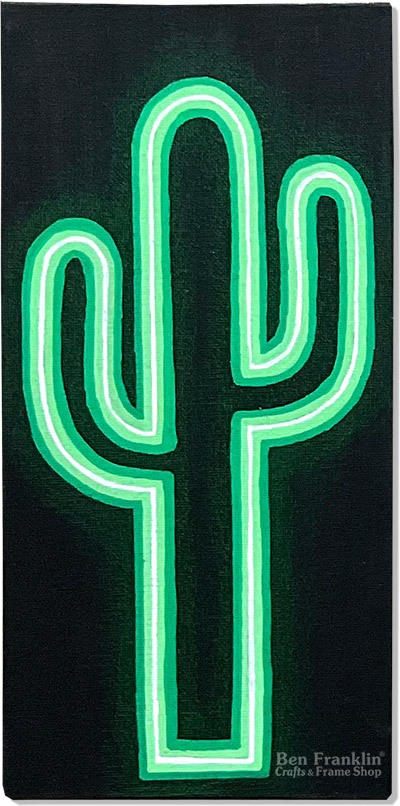
Are you ready to infuse a vibrant glow into your space without breaking the bank? Unlock the creative process of How to Paint a Faux Neon Sign with this comprehensive tutorial. We’ll guide you through the painting technique, or if you prefer, you can opt for POSCA pens to achieve an equally mesmerizing effect. Don’t forget to check out our “shorts” video on YouTube, where we’ve condensed the process into a quick video for all you visual learners.
Supplies needed to paint a faux neon sign:
(Supplies may vary by store, however, special store-to-store orders can be placed with a one-week turnaround. Substitutions will be suggested if a product is no longer available.)
Black canvas (or any other surface that you will need to paint black)
Acrylic Paints in assorted colors (or POSCA Paint Pens)
Paint Brushes
Pencil & Eraser
Ruler (optional)
Painter’s tape for creating clean lines (optional)
YouTube Shorts video tutorial on how to paint a "Faux Neon Sign":
Head over to our YouTube channel and watch our “shorts” video; How to Paint a Faux Neon Sign. In just a few minutes, we’ve condensed the process, providing a quick and visual guide to help you master the craft using acrylic paints and brushes. Click on the video below, or go to our YouTube Channel HERE.
STEP-BY-STEP INSTRUCTIONS:
1. Gather Your Materials
First things first, gather all the materials you’ll need for this project. Make sure you have a sturdy surface, a pencil, eraser, ruler, and a printout of your chosen design (if you don’t want to freehand it).
In our project, our surface is a black canvas. You can use any surface of your choice, but you’ll have to paint it black using an acrylic paint. Let it dry completely before moving on.
2. Create an Outline
Begin by sketching your design lightly on the chosen surface using a pencil. This will serve as your guideline when adding the paint. Ensure the lines are clean and well-defined for a professional look.

3. Prepare Your Workspace
Before diving into the creative process, make sure your workspace is well-lit and properly ventilated. Lay down newspaper or a drop cloth to protect surfaces, and have a jar of water or damp cloth handy for quick brush or pen cleaning.
4. Apply the First Layer
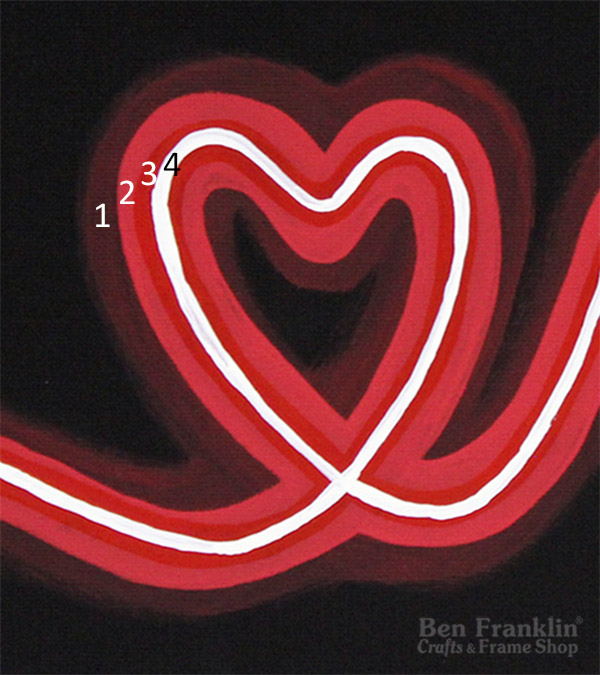
Now, let’s bring your faux neon sign to life by applying the initial layer of paint. Choose a faint light color that will serve as the base for the luminous glow. If you’re working with acrylic paint, ensure an even and consistent coat using a good quality brush. Watch as the colors pop against the dark background, enhancing the overall vibrancy of your creation. Allow this layer to dry thoroughly before moving on to the next step.

5. Add Depth with Layers
The magic happens in the layers! Gradually build up the intensity of the colors to create depth and mimic the radiance of a real neon sign. Blend where needed for a seamless transition between hues. Take your time, and let each layer dry before applying the next.

6. Highlighting Techniques
To make your faux neon sign pop, strategically add highlights to mimic the reflective quality of real neon tubing. This step enhances the illusion of light bouncing off the surface, giving your creation a lifelike glow.

Visit us In-Store for Your Faux Neon Sign Supplies
Congratulations! You’ve successfully painted your own faux neon sign, transforming your space into a vibrant haven. Whether you opted for POSCA pens or acrylic paint, the key lies in layering and highlighting to achieve that captivating glow. For all your crafting needs, including supplies and expert assistance, visit our Ben Franklin Crafts and Frame Shop stores in Bonney Lake and Monroe, WA. Subscribe to our YouTube channel for more tutorials and stay tuned for future crafting inspiration. Happy crafting!
PIN it!
Don’t forget to save this inspiring project for later by pinning it to your Pinterest board!


