
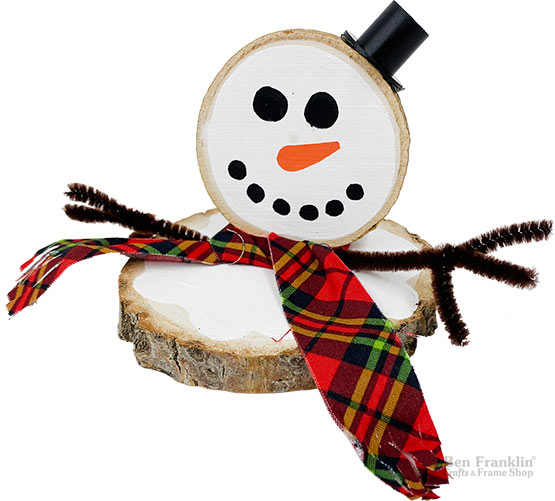
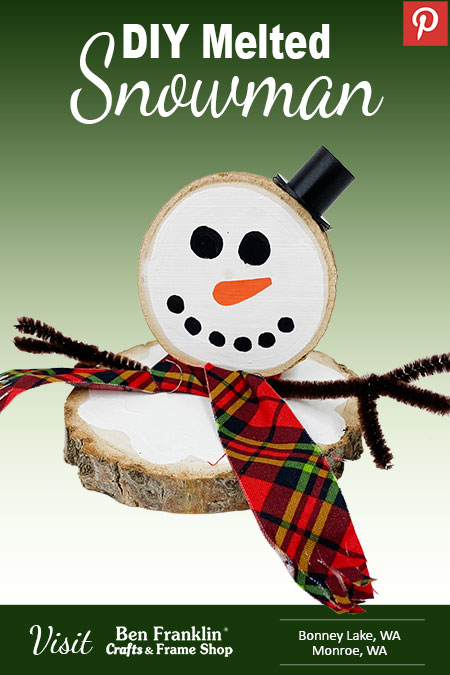

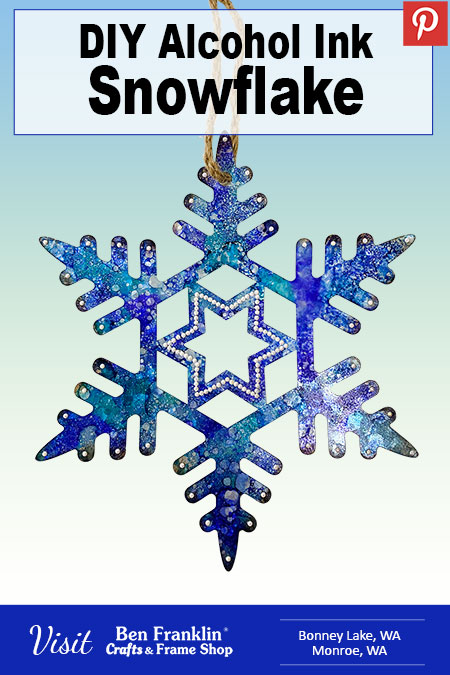
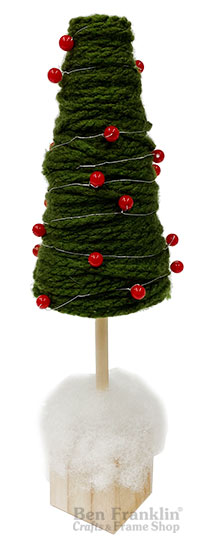
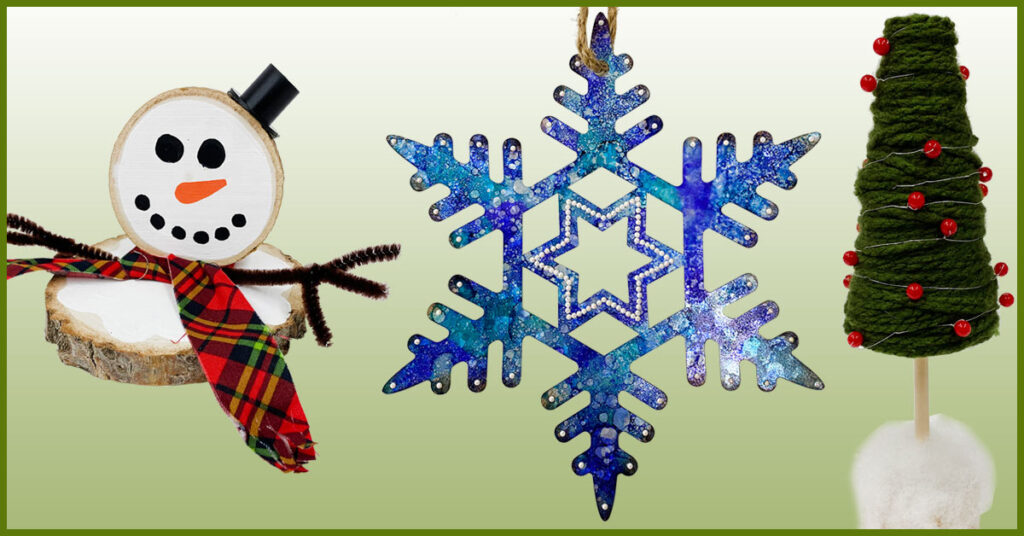
You’ll want to invite your friends to a night of holiday crafting! Come in to get the supplies you’ll need to make these 3 DIY Christmas Crafts! An adorable wood round melted snowman, a huge metal snowflake painted with alcohol inks, and a cute yarn tree. These are easy crafts, but we thought we’d give you the basic instructions on how to make them.
(Supplies may vary by store, however, special store-to-store orders can be placed with a one-week turnaround. Substitutions will be suggested if a product is no longer available.)
1 wood round 2 1/2in
1 wood round 4in
White paint
Paint brush
Orange and black POSCA paint pens
1 brown Chenille Stem
1″ x 15” strip of fabric
Glue dots
1. Paint the small and large wood round with the white acrylic paint, leaving a small edge. This will create the “snow” effect.
2. Paint on a face using the POSCA paint pens.
3. Cut the chenille stem in half and then in half again. You should have 4 equal sized pieces of the chenille stem.
4. Twist the chenille stem onto another, about 2/3 from the top. Bend all points in the same direction to create the hand.
5. Place a line of 3 glue dots on the large wood round where you desire the head to be. Then place the arms on the ends of the glue dots and place the head in the middle.
6. Tie the fabric strip around the base of the head to create the scarf.
(Supplies may vary by store, however, special store-to-store orders can be placed with a one-week turnaround. Substitutions will be suggested if a product is no longer available.)
Galvanized Snowflake
Alcohol Inks
Felt Dabber
Diamond Dotz (white)
Diamond Dotz Adhesive
Optional (rubbing alcohol & spray bottle)
1. Drop some alcohol ink onto the snowflake and use the felt dabber to distribute it around covering the entire snowflake.
2. Optional: spritz with some rubbing alcohol to get a spotted look if desired.
3. Apply some Diamond Dotz glue where you want the dotz to be placed. (The glue will remain tacky, so be sure to place it mindfully).
4. Once the glue turns clear (it can take a few minutes), you can apply the gems on top. Let everything dry completely.
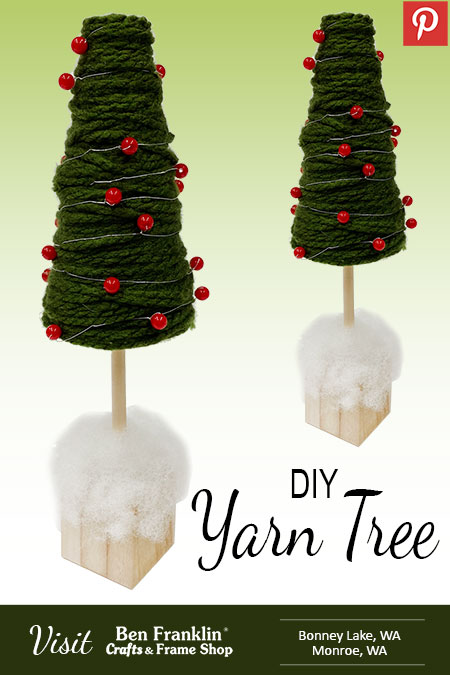
(Supplies may vary by store, however, special store-to-store orders can be placed with a one-week turnaround. Substitutions will be suggested if a product is no longer available.)
Yarn
Dowel
2” Wood Cube
Bead Strand
Foam Cone
Tacky Glue
Hot Glue
Poly-fill Stuffing
1. Wrap the yarn around the cone until you reach the top. Apply tacky glue to the top of the cone and continue in a spiral until you reach the center and cut the end.
2. Tuck the end of the bead strand under the yarn and wrap as desired, tuck the end when finished.
3. Insert a dowel into the center, bottom of cone.
4. Hot glue the other end of the dowel to the center of the cube, hold until the hot glue cools down.
5. Add a little bit of hot glue to the top of the wood block, and around the dowel, then place some Poly-fill stuffing to create the snow effect.


Huge savings offered throughout both our Bonney Lake and Monroe stores.