


We’re thrilled to guide you through creating a whimsical DIY Christmas Train Diorama that will add a touch of holiday magic to your home. Gather the following supplies from our extensive collection and let your creativity shine. Don’t worry – if we sold out of the mini wood train & gifts, feel free to use any small items or figurines to create the same enchanting scene. We have a great selection to choose from! Stop by our Ben Franklin Crafts and Frame Shop stores today!
(Supplies may vary by store, however, special store-to-store orders can be placed with a one-week turnaround. Substitutions will be suggested if a product is no longer available.)
12” Unfinished Wood Tray
Green Felt (in three different shades)
Tree Cutout Shape (Print template – on page 3)
3” Wooden Train (or other small items / figurines)
2” Wooden Presents (or other small items / figurines)
~ NOTE: Wood Train & Gifts are available at our Monroe location only.
Posca Paint Pen (in white)
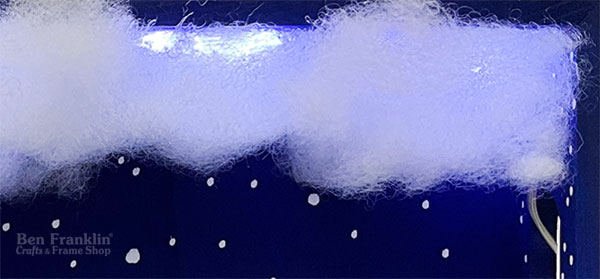
30ct Cool Firefly Lights
Poly-Fil Polyester Fiberfill
½” White Pom Poms
Paint (white and navy blue)
Paint Brushes
Your Choice Adhesive
Scissors
Pen
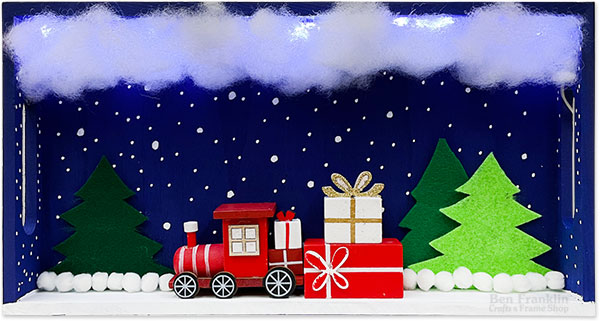
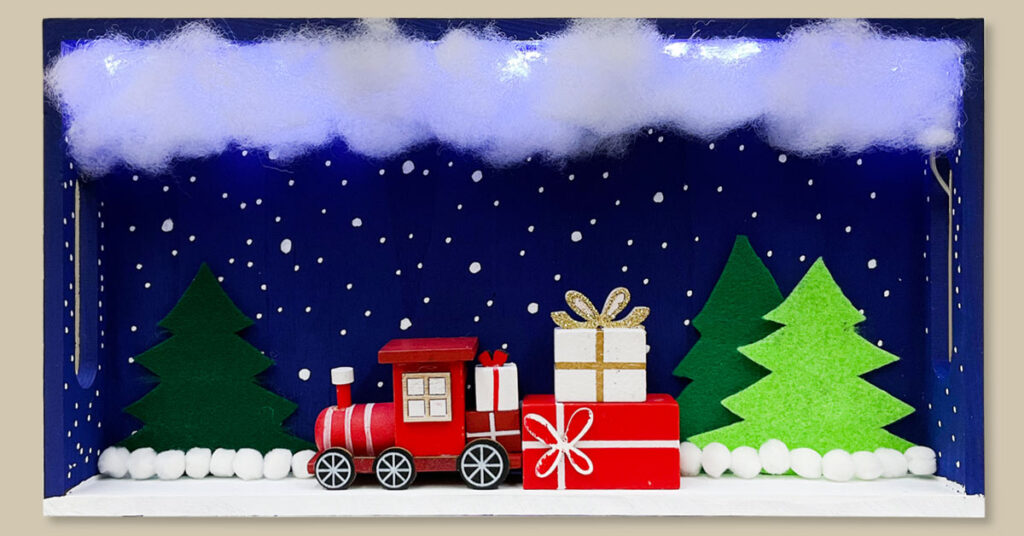
1. Begin by painting the inside and outside of the tray with a soothing navy blue (skip the inside bottom for now, as this will be your snowy base—paint it white later). Feel free to paint the back as well for a polished finish. Allow it to dry completely.
2. Trace tree shapes (template is on page 3 here) onto the green felt sheets and carefully cut them out.
3. Adhere the green felt trees to the inside of the tray, creating a picturesque Christmas forest.
4. Embrace the winter wonderland vibe by using the white Posca Paint Pen to add various-sized dots, simulating falling snow on the tray.
5. Illuminate your scene by attaching the Firefly Lights to the inner, upper part of the tray. Cover the lights with fluffy Poly-Fil, creating a soft snowy effect. Pro tip: discreetly fold the lights to match the tray’s length and weave them through the handle for a seamless look.
6. Bring the magic to life by affixing the train figurine to the present figurine. Secure them both to the center base of the tray, applying adhesive to the bottom and backside of the presents and the train wheels closest to the back. (Remember that we have many other miniature items that you could use in your diorama. Come in to see our selection!)
7. Complete the winter scene by attaching white pom poms across the remaining bottom of the tray, resembling snow-covered terrain.
Let your imagination run wild as you craft this delightful Christmas Train Diorama! Create lasting memories with handmade holiday décor—because nothing says “Merry Christmas” like a touch of DIY magic.
Find all the supplies you need at our Ben Franklin Crafts and Frame Shop stores. (Note that the train & wood gifts are available ONLY at our Monroe location – for a limited time).
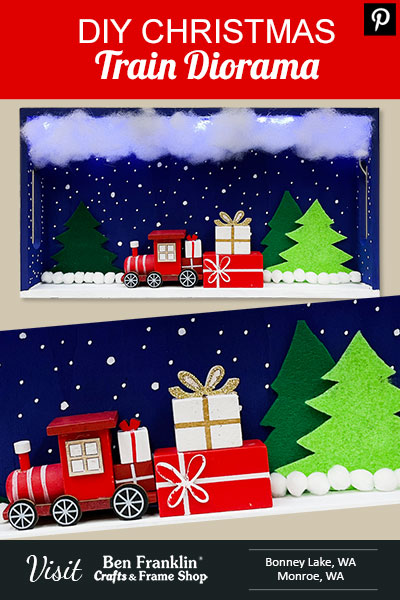
Don’t forget to save this easy project for later by pinning it to your Pinterest board!


Huge savings offered throughout both our Bonney Lake and Monroe stores.