In this step-by-step guide, we’ll walk you through the creation of an adorable snowman wood sign using a variety of supplies available in our stores in Bonney Lake and Monroe, WA. Whether you’re a seasoned crafter or a beginner, this project is perfect for adding a touch of festive charm to your home décor. From the choice of an unfinished wood pallet to the final details drawn with Posca Paint Pens, we’ve got you covered. So, let’s dive into the creative process and make your very own whimsical snowman wood sign that will brighten up any space.

(Supplies may vary by store, however, special store-to-store orders can be placed with a one-week turnaround. Substitutions will be suggested if a product is no longer available.)
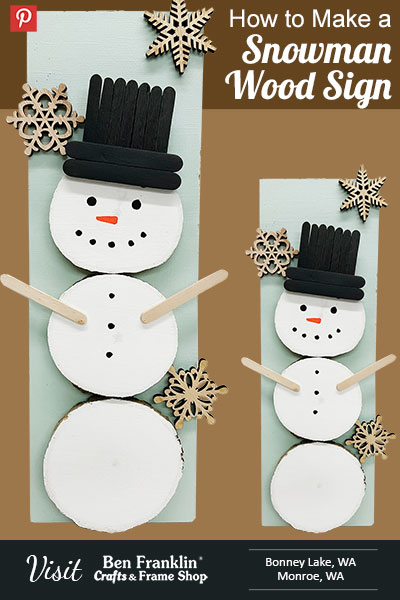
DIY Snowman Wood Sign
Supplies you'll need:
12” Unfinished Wood Pallet
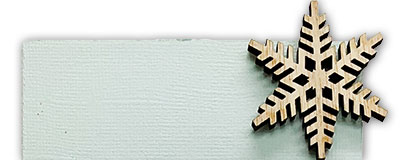
Three Unfinished Wood Snowflakes
Three 3.5” Wood Slices
Seven ¼” Popsicle Sticks
Four ½” Popsicle Sticks
Posca Paint Pens (orange and black)
Paper (your choice)
Acrylic Paint (white)
Paint Brush
Mod Podge
Sanding Block
Your Choice of Adhesive
Step 1: Prepare the Surface
– Apply Mod Podge to the Wood Board: Start by applying a layer of Mod Podge to the surface of the wood pallet using a paintbrush. Ensure an even and generous application, covering the entire area where you plan to attach the paper.
– Position the Paper: Carefully place the cut paper onto the Mod Podge-coated wood board, aligning it with the edges. Smooth out any air bubbles or wrinkles by gently pressing down on the paper with your hands.
– Sand the Edges: Once the Mod Podge is dry, use a sanding block to smooth the edges of the paper and wood board. This creates a seamless transition and gives your project a polished, professional look.
– Smooth and Seal: Apply another layer of Mod Podge over the top of the paper. This serves to seal the paper to the wood and provides a protective finish. Make sure to cover the entire surface evenly.
– Allow to Dry: Let the Mod Podge dry completely. This step is crucial to ensure a secure and durable bond between the paper and the wood. Depending on environmental conditions, drying times may vary, but it typically takes about 15-20 minutes.
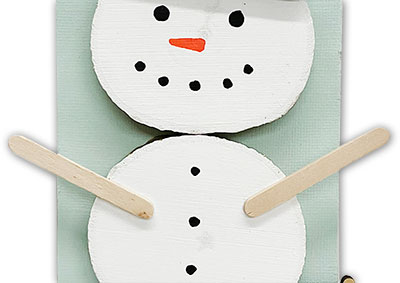
Step 2: Create the Snowman Body
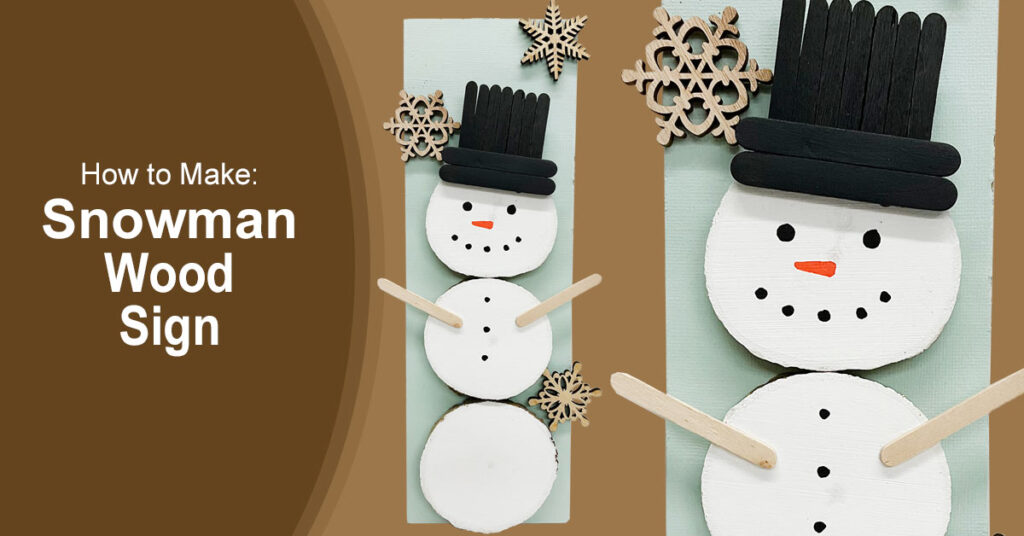
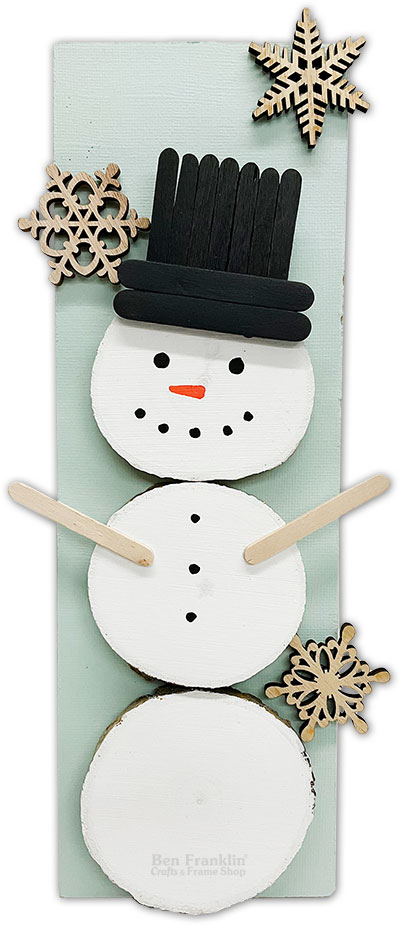
Paint three 3.5” wood slices white and allow them to dry. Once dry, adhere them to the wood board, stacking them from the bottom. This forms the body of your charming snowman.
Step 3: Create the Snowman's Hat
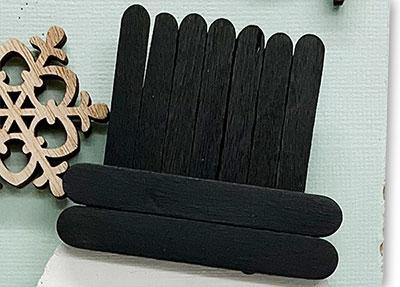
– Prepare the Popsicle Sticks: Gather seven ¼” popsicle sticks and two ½” popsicle sticks for the hat.
– Create the Base: Glue the seven smaller sticks together side by side, forming a flat row.
– Add the Brim: Apply glue to one side of the two larger popsicle sticks and attach them perpendicularly at the bottom of the row, creating a T-shape for the brim.
– Secure and Dry: Press gently to secure the sticks and allow the glue to dry completely.
– Paint the Hat: Once dry, paint the entire hat black to complete the snowman’s stylish headgear.
Step 4: Add Delicate Snowflakes
Enhance the wintry vibe by adhering three unfinished wood snowflakes onto the wood board. Their intricate designs will complement the snowman’s charm.
Step 5: Assemble the Snowman's Features
Affix the crafted hat to the top wood slice and attach the remaining ½” popsicle sticks to the center wood disk, creating whimsical arms for your snowman.
Step 6: Bring the Snowman to Life
Using Posca Paint Pens in orange and black, draw a cheerful face on the top wood disk and three dots on the center wood disk. This step adds the finishing touches, giving your snowman a personality that will bring joy to all who see it.
Conclusion
Congratulations! You’ve successfully crafted a delightful snowman wood sign that’s sure to become a festive focal point in your home. At Ben Franklin Crafts and Frame Shop, we’re thrilled to provide you with the high-quality supplies needed for this project. Come in to explore our extensive selection of crafting materials for more inspiration and creative endeavors. Embrace the joy of crafting with us, and let your imagination run wild as you bring warmth and whimsy into your living space. Happy crafting!
PIN it!
Don’t forget to save this easy project for later by pinning it to your Pinterest board!