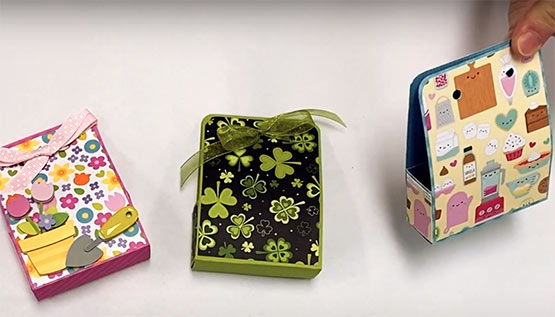
Let Melanie show you how simple it is to make a mini paper gift box using paper, a paper cutter, a scoreboard (or bonefolder) and a corner rounder. You can watch her video, then print the instructions for later use. Use this technique to make mini boxes for Valentine’s Day, party favors, birthdays, St. Patrick’s Day, Easter and all year round!
Supplies needed to make a DIY Mini Paper Gift Box

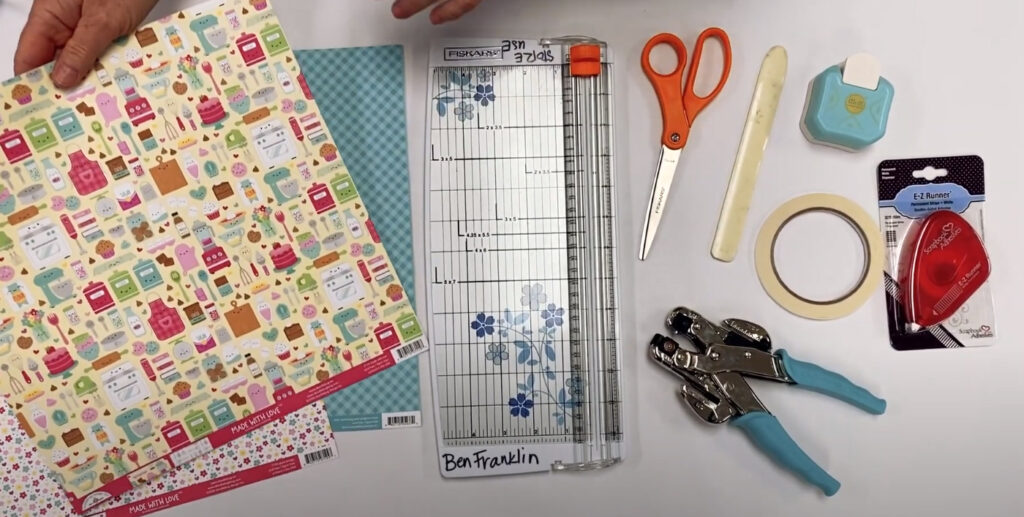
Here’s a list of the supplies you’ll need to make your first mini paper gift box – (available at our Ben Franklin Crafts and Frame Shop stores in Bonney Lake & Monroe, WA – while supplies last):
SUPPLIES:
• Cardstock Paper (for background)
• Patterned Paper (also known as DSP: Designer Series Paper)
• Paper Cutter
• Scoreboard or Bonefolder
• Corner Rounder
• Adhesive Tape/Glue
• Crop-A-Dile or Hole Puncher
• Ribbon & Embellishments (to decorate)
Video Tutorial:
Melanie’s instructions are available in the video below, or click here to go to our YouTube channel.
Step-by-Step Instructions:
1. Take the cardstock paper and cut 1 piece to 8½” x 2¾”; place horizontally on the scoreboard and score at 3¾” & 4¾”. Round all corners.
2. From the same cardstock paper, cut 2 pieces to 2¾” x 1⅜”; place horizontally on the scoreboard and score ⅞” from each edge.
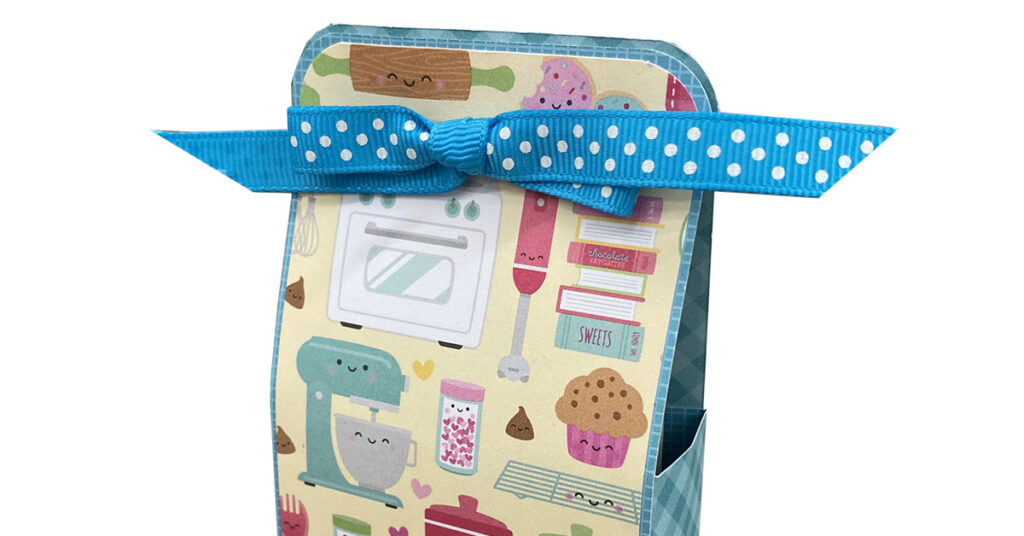
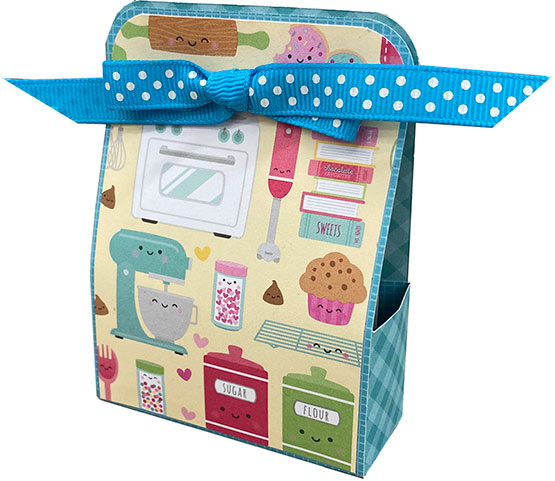
3. From patterned paper, cut 2 pieces to 2⅝” x 3⅝”; round 2 of the 4 corners (choose the corners that will be at the top of your box).
4. From the same patterned paper, cut 2 pieces to ⅞” x 1¼”.
5. Fold & burnish all the score lines.
6. Apply the glue/adhesive to the back of 2 larger pieces of patterned paper and stick them onto the larger pieces of cardstock paper. Align the rounded edges with the top of the box.
7. Apply the glue/adhesive to the back of the 2 smaller pieces of patterned paper and stick onto the center of the 2 smaller pieces of cardstock paper.
8. With your two smaller pieces facing up, apply some glue/adhesive to the sides that are on the outside of the score lines.
9. Take the sticky sides of your smaller pieces and attach them to the inside of the larger piece from step 1, lining up with the score lines at the bottom and sides. This will create the pocket holder. Make sure the patterned paper is facing outward.
10. Take your Crop-A-Dile or hole puncher and punch two holes at the top, same distance from the top and sides.
11. Add embellishments of your choice.
12. Insert your ribbon through the holes.
13. Fill your gift bag with either 4 tea bags or some small sweet treats. Tie together at the top and gift to your friends, family or valentine!
If you have any questions, don’t hesitate to contact us! (phone numbers are below)
(Supplies may vary by store, however, special store-to-store orders can be placed with a one-week turnaround. Substitutions will be suggested if a product is no longer available.)
