
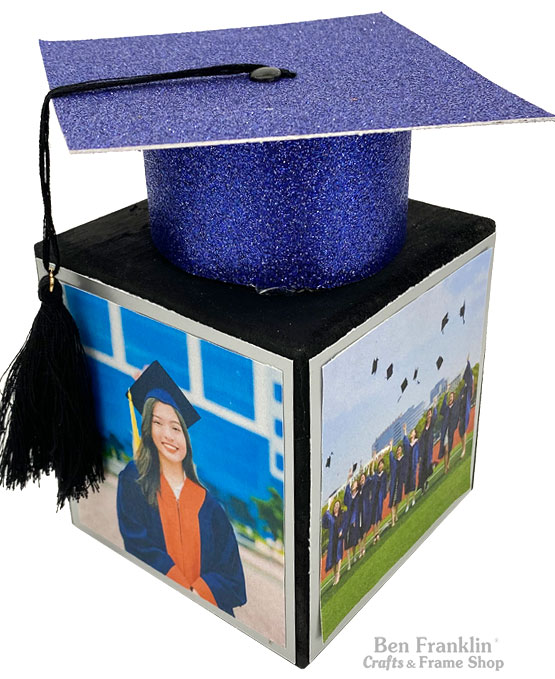
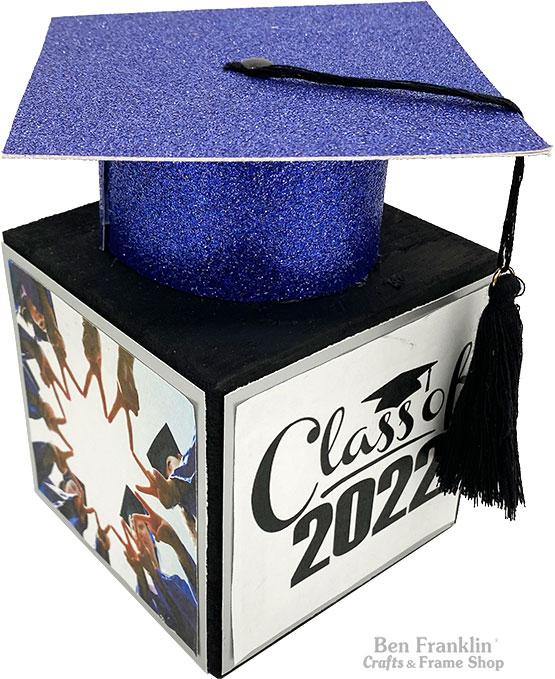
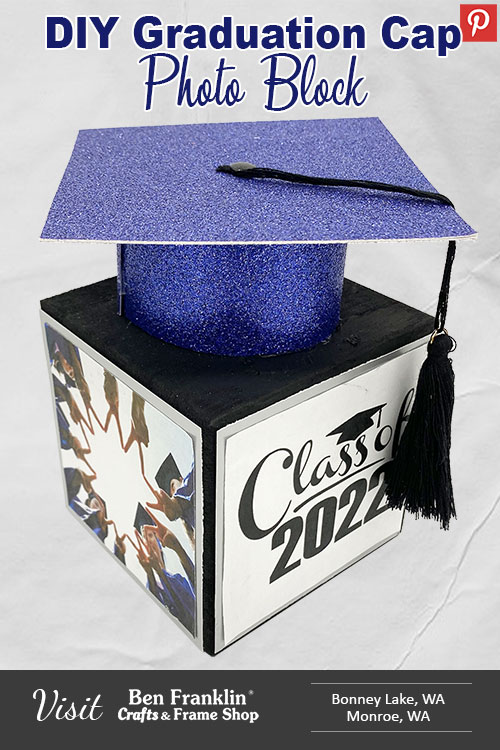
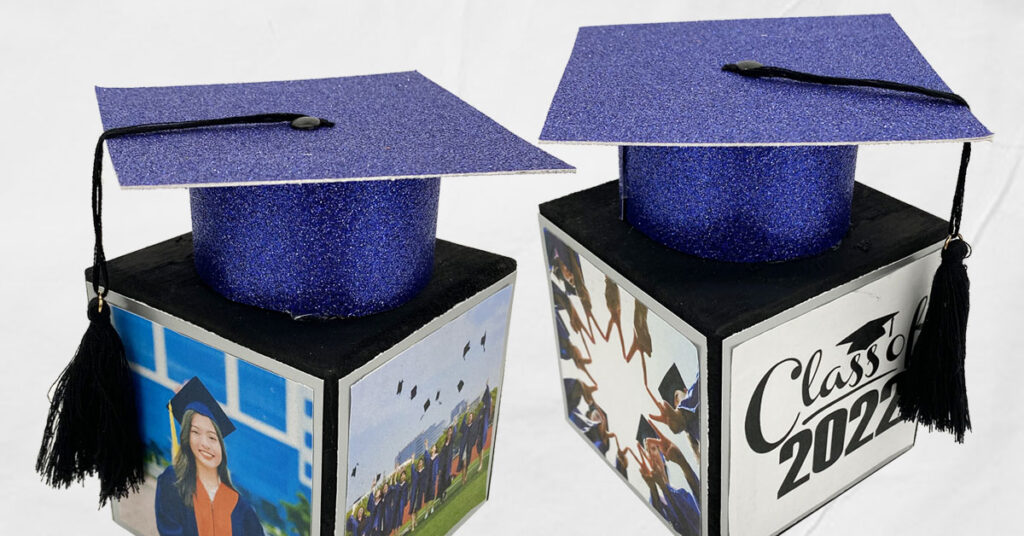
Create this fun and easy DIY Graduation Cap Photo Block centerpiece for your graduation party! Display different photos on each side of our wooden block and attach a graduation cap made from our cardstock paper. Scroll down for the step-by-step printable instructions and the video tutorial.
(Supplies may vary by store, however, special store-to-store orders can be placed with a one-week turnaround. Substitutions will be suggested if a product is no longer available.)
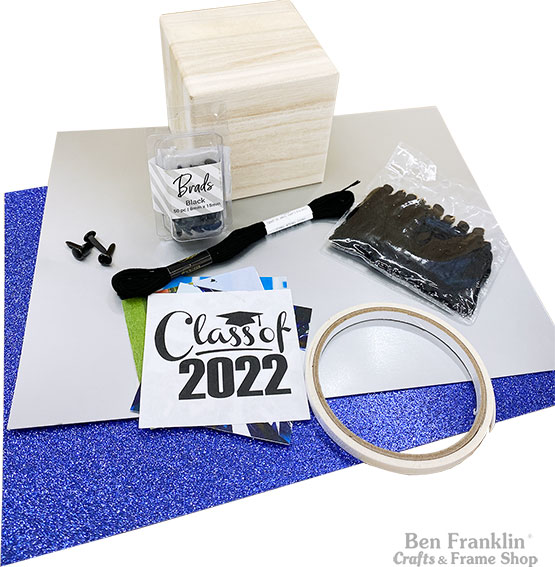
4” x 4” wooden block
Black paint
Foam brush
Black thread
Black tassel ends / or make your own
Double-sided tape
Black 8mm x 15mm brads
Scissors
1 sheet of 12” x 12” cardstock paper (we used silver)
1 sheet of 8.5” x 11” cardstock paper (we used a glittery-blue)
Hot glue gun & glue stick
4 photos of your grad
1. Brush black paint on the wooden block to cover it completely. Let it dry.
2. Trim your photos to 3” x 3”.
3. Using the silver cardstock paper, cut four 3.25” x 3.25” squares. These will be a little larger than your photos. This will create a border around each picture.
4. Add double-sided tape to the back of your photos and position them centered onto the silver paper squares.
5. Add double-sided tape to the back of the silver paper and attach onto your wooden block. (on the four sides, not the top and bottom).
6. Cut two 4” x 4” squares from the glittery-blue paper. Then you will add double-sided tape to the back of one square. Now attach the backs together so both sides show the glittery side. Make sure to watch our video if you’re not sure. WATCH HERE.
7. Poke a hole in the center of the square and add a black brad (open up the prongs so it won’t fall out).
8. Cut a piece of black string at desired length. Tie one end to the tassel, and the other between the top of the brad and paper. (If you don’t have a tassel, just make your own with the same thread)
9. Cut an 8.5” x 1.5” strip from the glittery-blue paper.
10. Adhere the ends together using hot glue. Make sure that the glittery side is facing out. This will become a circle shape.
11. Adhere the circle to the bottom of the square to finish creating the cap.
12. Lastly, adhere the bottom of the cap to the top of the wooden block.

Huge savings offered throughout both our Bonney Lake and Monroe stores.