


Start crafting using our newest selection of Super Moss and embroidery hoops! Here we created a DIY Moss Tree Wall Art with moss, jute for the roots & trunk and an embroidery hoop. We included a video tutorial to make it easy for you to recreate this project at home.
(Supplies may vary by store, however, special store-to-store orders can be placed with a one-week turnaround. Substitutions will be suggested if a product is no longer available.)
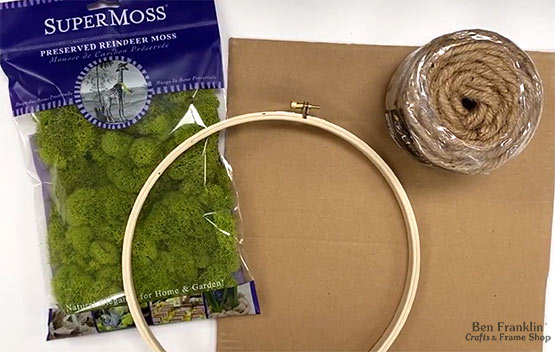
• 10” embroidery hoop
• Jute
• SuperMoss® Preserved Reindeer Moss (color we used was Chartreuse)
• Cardboard
• Hot glue gun & glue sticks
• Scissors
Watch the video for step-by-step instructions. Click HERE.
1. Cut your cardboard piece to fit the top part of the hoop. To help you figure out the size of the cardboard needed, use the hoop to trace the shape. This will be used as the backing where you’ll glue the moss and tree trunk (jute).
2. Glue the cardboard piece to the top edge of the hoop.
3. Cut six 12” pieces of jute to make the tree trunk.
4. Flip the hoop over to the back and glue the jute pieces to the back of the cardboard close together.
5. Twist the jute strips to create the trunk. Stop twisting at about 1” from the ends.
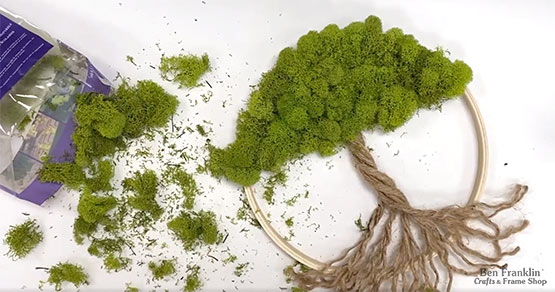
6. Space out the ends of the jute along the bottom of the hoop to create roots and glue in place. Before you glue, you can also unravel the jute strips to create more roots. Glue to the hoop.
7. Glue the moss pieces to the front side of the cardboard. Let dry, and enjoy!


Huge savings offered throughout both our Bonney Lake and Monroe stores.