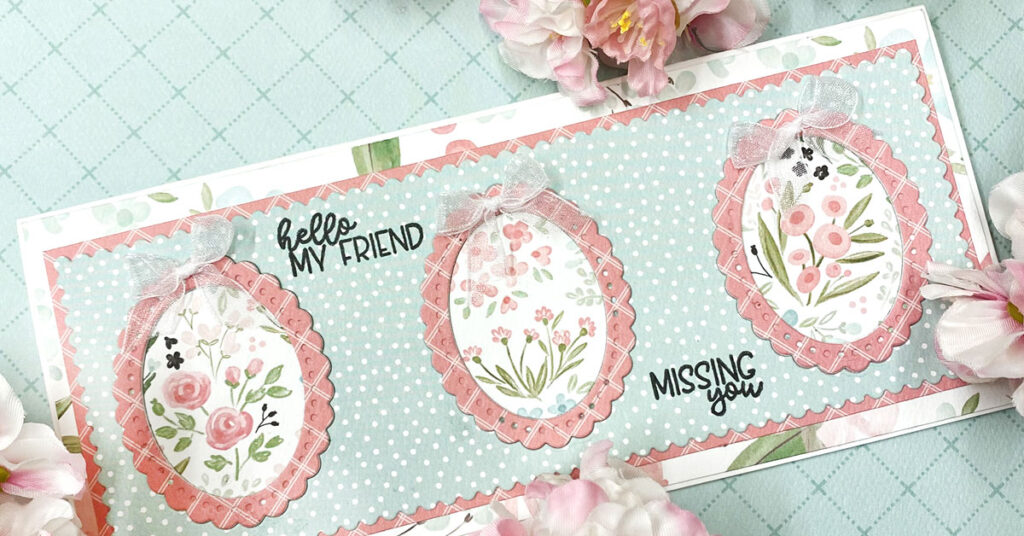
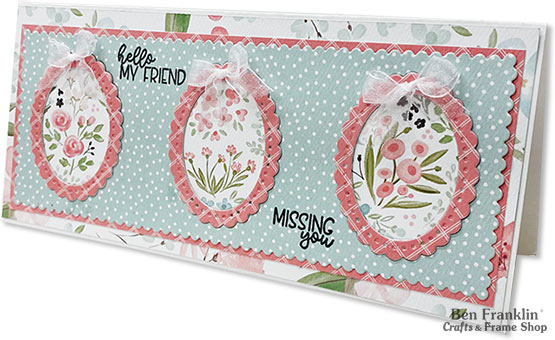
You will love the Flower Garden paper collection by Carta Bella Paper Co that we used to make this adorable Scalloped Frame Card. Melanie made a video to show you exactly how to make it. This card would be perfect for Mother’s Day, Best Friend Day, for grandma, and sisters.
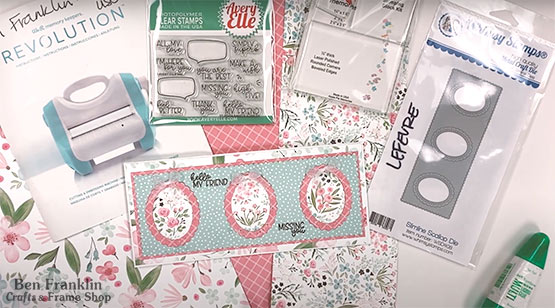
Supplies needed to make 1 Scalloped Frame Card:
(Supplies may vary by store, however, special store-to-store orders can be placed with a one-week turnaround. Substitutions will be suggested if a product is no longer available.)

• Revolution Cutting & Embossing Machine
• Favorite adhesive
• Avery Elle Photopolymer Clear Stamps (we used the “Speech Bubbles” set)
• White paper
• Three different colors of paper (we used patterned paper from the Flower Garden collection by Carta Bella Paper Co, but you can use any paper you’d like)
• Whimsey Stamps Metal Craft Die (we used the Slimline Scallop Die)
• Stamping blocks
• Paper cutter
• Scoreboard and bonefolder
Directions:
Watch the video for step-by-step instructions. Click HERE.
1. Cut the white paper to 7½” x 8½”. Score it down the center of the short side at 3¾”. Fold it in half to make the card base.
2. Cut one of the colored paper to 3¾” x 8½”. Glue this piece onto the front of the card from step 1.
3. Cut the second colored paper to 3⅛” x 8⅛”. Glue on top of the layer from step 2.
4. Cut the third colored paper to 3½” x 8½” (this will be the die-cut layer).
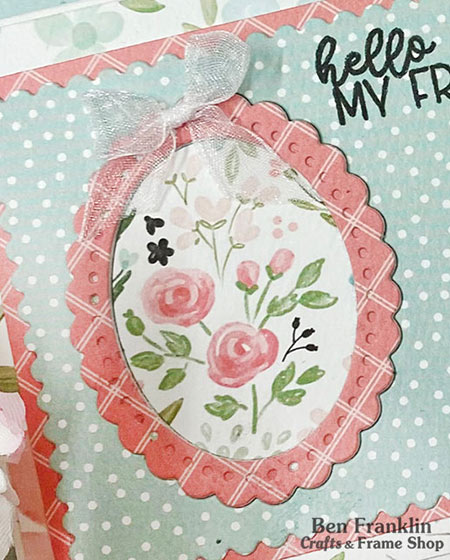
5. Use the layer from step 4 to run through the Revolution Cutting & Embossing Machine. Keep the large cut-out and the scalloped frame cut-outs.
6. Take the large cut-out layer and glue it on top of the layer from step 3.
7. Create additional scalloped frame layers using any leftover paper. (Tip: you can cut out additional frames to stack and create a dimensional look to your card).
8. Also keep your favorite oval-shaped cut-outs while creating the frames. Use these to fill the inside of the frames on the card.
9. Stamp the quotes. And finally, if you’d like, you can add embellishments to the card. We added little bows at the top of each frame.