


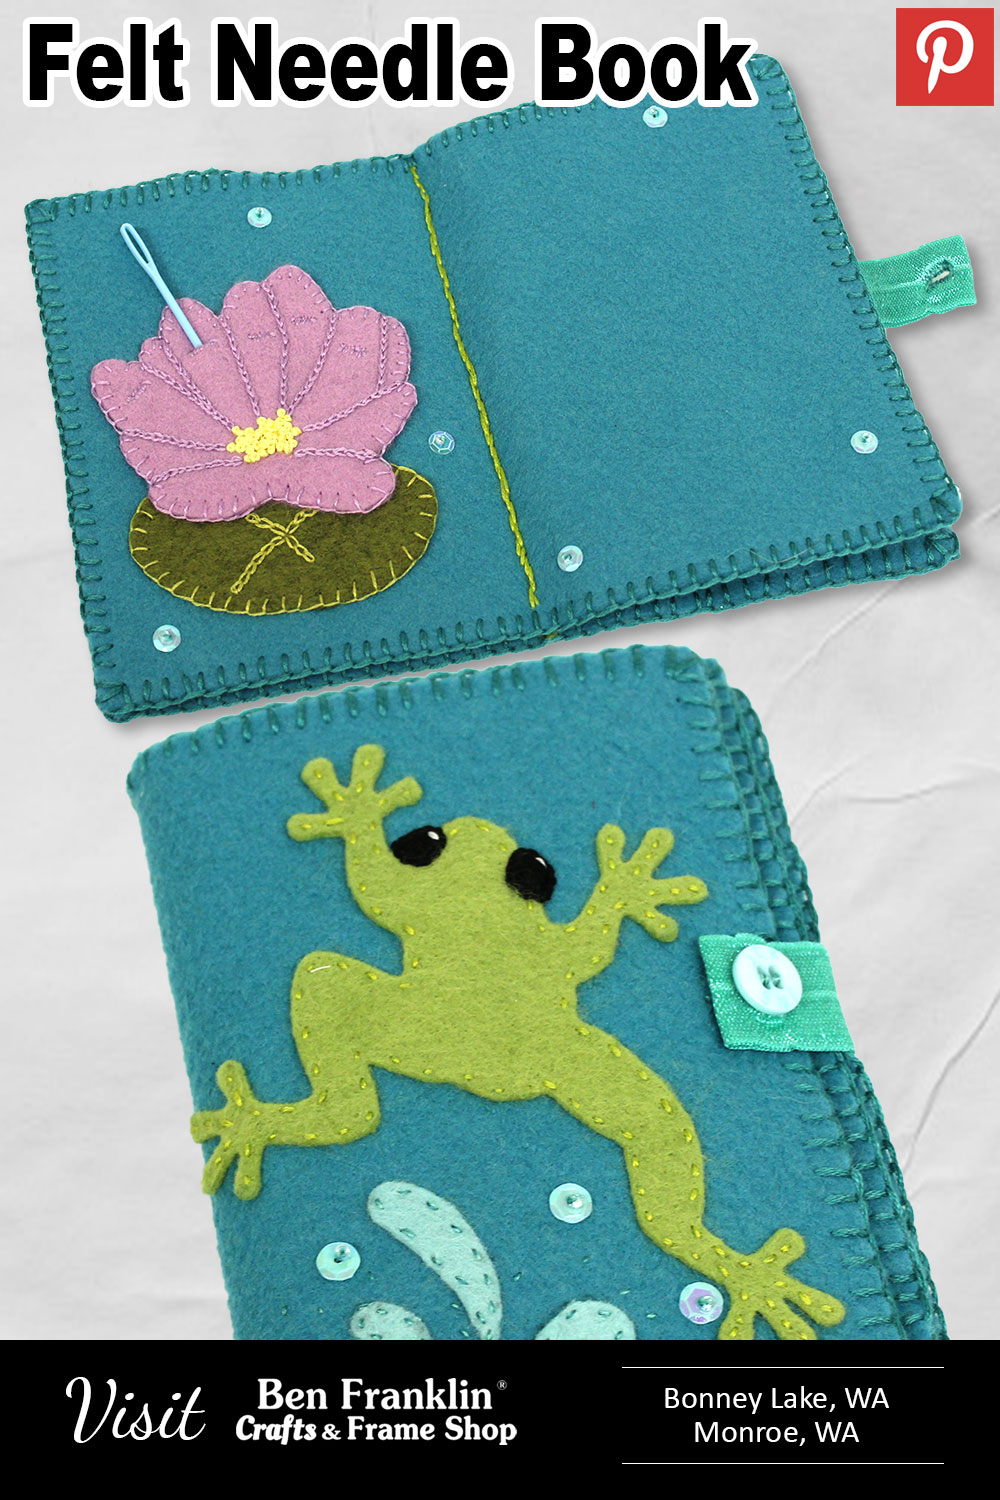
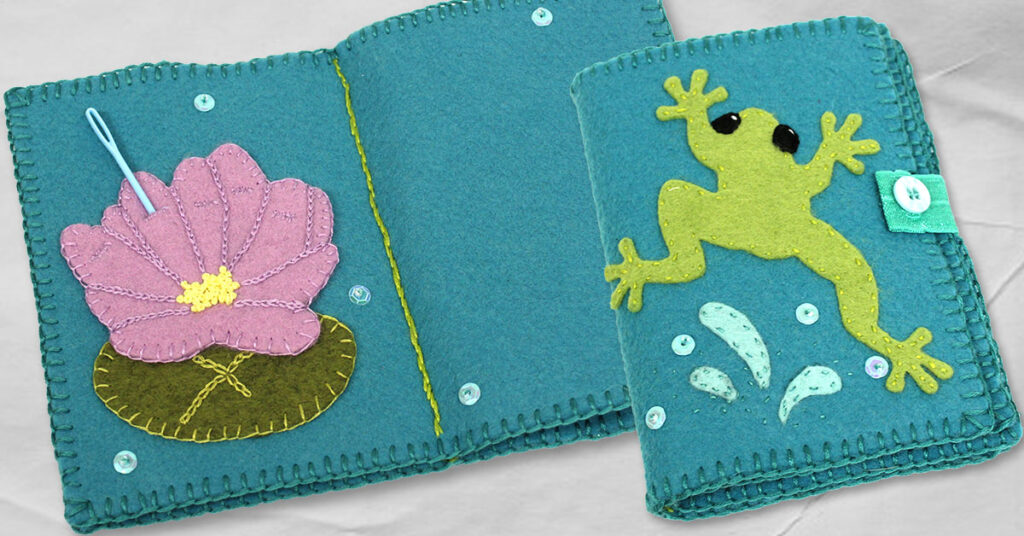
Make your own needle carrying case by making this adorable DIY Felt Needle Book using felt and floss. This inspiration is brought to you by Julie at our Ben Franklin Crafts and Frame Shop store in Bonney Lake, WA.
NOTE: You’ll need to know how to make a chain stitch and a blanket stitch to make this project. But don’t worry! If you don’t know how, we’ve included video tutorials from other bloggers to help you make those beautiful stitches on your felt case.
(Supplies may vary by store, however, special store-to-store orders can be placed with a one-week turnaround. Substitutions will be suggested if a product is no longer available.)
4 Sheets of Felt
DMC Floss
Needle
Use of our Die Cut Machine
Rotary Cutter
Cutting Mat
Scissors
1. Stack 4 rectangle pieces of wool felt and do a chain stitch (video below) binding down the center at halfway to create the book.
2. Close the book and trim the edges to make all the pages even. Use a rotary cutter and mat to do this step. It makes it super easy and quick.
3. Embellish the front cover, back and any pages you wish. Add any pockets or loops to hold scissors in place. Keep in mind that every two pages will be stitched together. You can use our die cut machine to cut wool felt shapes like we did. Adding buttons, beads, and sequins will make this needle book totally you!
4. Lastly, use a blanket stitch (video below) to attach the edges of the first two pages together, and then do the same to attach the middle two pages together.
Video tutorial courtesy of cutesycrafts.com
Video tutorial courtesy of RedTedArt.com

Huge savings offered throughout both our Bonney Lake and Monroe stores.