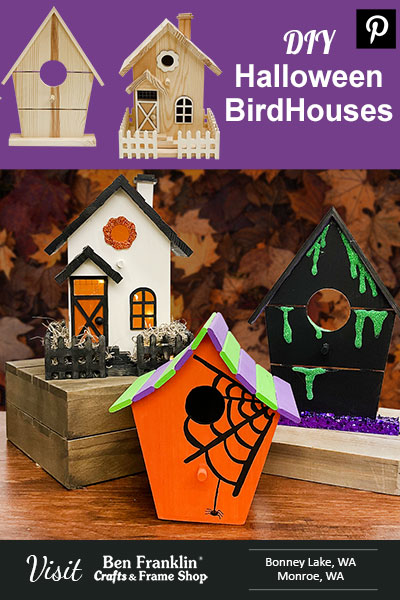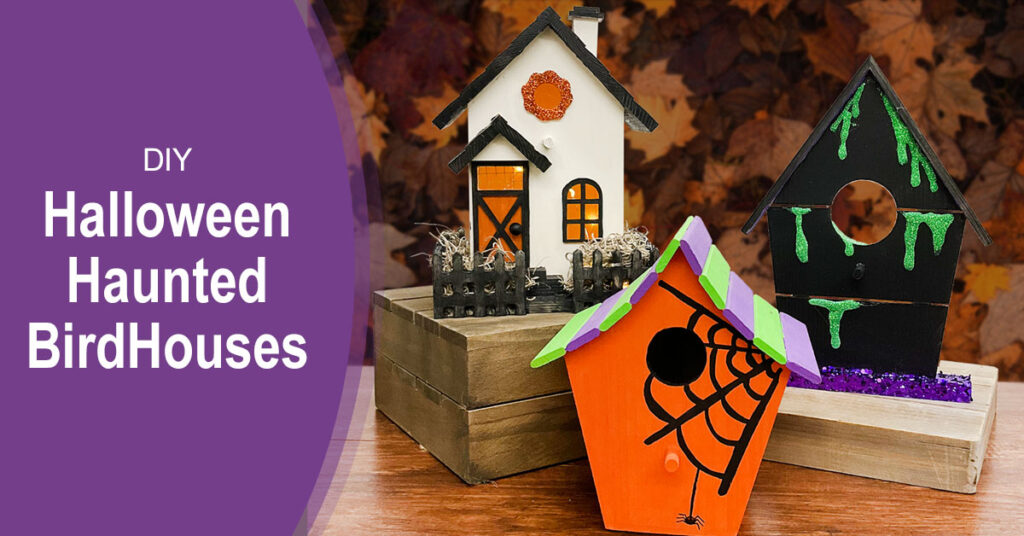
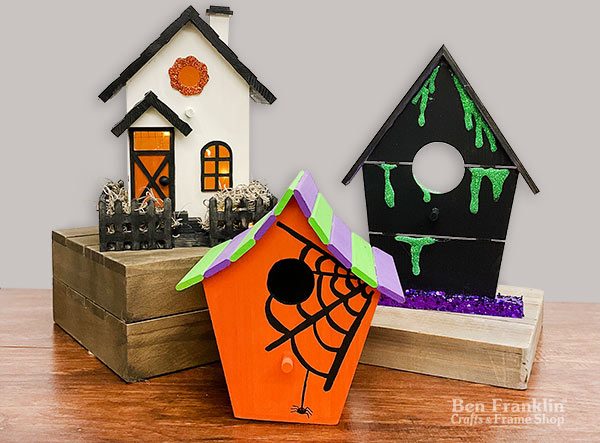
Welcome, fellow craft enthusiasts! Today, we’re diving into an exciting project that’s perfect for the Halloween season: crafting your very own DIY Haunted Houses. Inspired by the enchanting creations spotted on Pinterest, we’re offering these ideas for you to get inspired to create your own. Skip the store-bought and embrace the creative journey with us. Transform simple wooden birdhouses into a spine-chilling Halloween village that perfectly complements your existing decor.
Supplies needed to create DIY Halloween Haunted Birdhouses:
(Supplies may vary by store, however, special store-to-store orders can be placed with a one-week turnaround. Substitutions will be suggested if a product is no longer available.)

– Unfinished wooden birdhouses
– Assorted wood or cardboard scraps for embellishments
– Hot glue gun and glue sticks
– Acrylic paint and brushes
– Black Sharpie marker
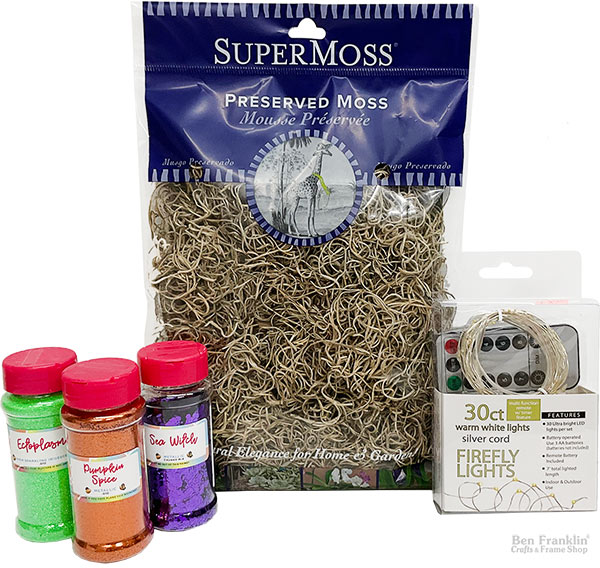
– Glitter for added flair
– SuperMoss
– Firefly Lights
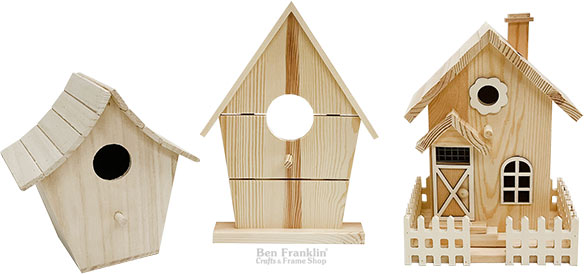
1. Prepping Your Haunted Canvas
Stop by our Ben Franklin Crafts and Frame Shop stores in Bonney Lake and Monroe, WA to purchase adorable unfinished wood birdhouses with intriguing shapes and dimensions.
– Enhance the original designs: Before diving into painting, it’s the perfect opportunity to add elements that distinguish your birdhouses from their avian counterparts. Incorporate extra chimneys, graveyards, and even church crosses using cardboard or wood scraps. Use hot glue to secure your additions in place.
2. Painting the Sinister Charm
With your prepped birdhouses in hand, it’s time to infuse them with haunting color:
– Use acrylic paint to cover the surfaces. You might need a few coats of paint for optimal coverage. To maintain a cohesive aesthetic, select a color scheme that suits your eerie vision.
3. Unveiling the Haunting Details
Now, let’s breathe life (or should we say, afterlife) into our haunted houses:
– Infuse charm with details: At this stage, it’s time to add the finer touches that bring your haunted village to life. Incorporate elements like spiders, spider webs, fences, windows, ghosts, and trees. Employ a thin paintbrush or black Sharpie marker for precise detailing, such as drawing intricate spider webs.
– A touch of sparkle: Elevate the spookiness factor by sprinkling glitter across some sections of your houses. The shimmering effect adds an extra layer of enchantment to your creations.
4. Display and DeLIGHT
With the finishing touches complete, it’s time to exhibit your DIY Haunted Houses with pride:
– If the shape of the houses permits, insert battery-operated FireFly lights to make it glow.
– Find your display spot: Choose a prominent spot to showcase your hauntingly beautiful village. Whether it’s a mantel, entryway, or centerpiece, let your imagination guide you.
– Revel in the eerie charm: Step back and admire your handiwork. The result? A collection of unique, personalized haunted houses that perfectly capture the Halloween spirit.
Visit Us In-Store for Your Crafting Needs
We hope this DIY guide inspires you to dive into the realm of Halloween crafting. The process of transforming ordinary birdhouses into ghostly abodes is a testament to the power of creativity and imagination. As you embark on this journey, remember that there’s no right or wrong—just your unique spin on spooky fun. Happy crafting, and may your haunted houses become a bewitching highlight of your Halloween decor!
Visit our Ben Franklin Crafts and Frame Shop stores in Bonney Lake and Monroe, WA. Let’s make this fall a season of creativity, inspiration, and beautifully crafted memories.
PIN it!
Don’t forget to save this inspiring project for later by pinning it to your Pinterest board!