


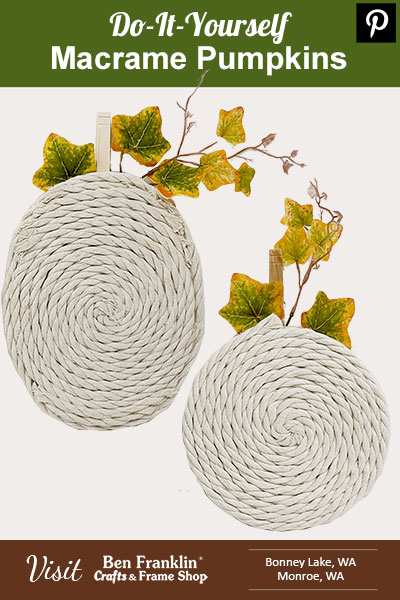
Welcome to our DIY Macramé Pumpkins fall project tutorial!
Are you ready to embrace the cozy vibes of fall? If you’re looking for a creative way to bring autumn warmth into your home decor, our Ben Franklin Crafts and Frame Shop stores in Bonney Lake and Monroe, WA have just the right project for you: DIY Macramé Pumpkins! With our wide range of supplies and exceptional customer service, we’re here to help you create stunning macramé pumpkins that will add a touch of rustic charm to your living spaces. Let’s dive into the step-by-step process and gather the supplies you’ll need for this adorable craft.
(Supplies may vary by store, however, special store-to-store orders can be placed with a one-week turnaround. Substitutions will be suggested if a product is no longer available.)
– Spool of Rope
– Clothespins
– Unfinished Wood Disk Ornament
– Unfinished Wood Oval Surface
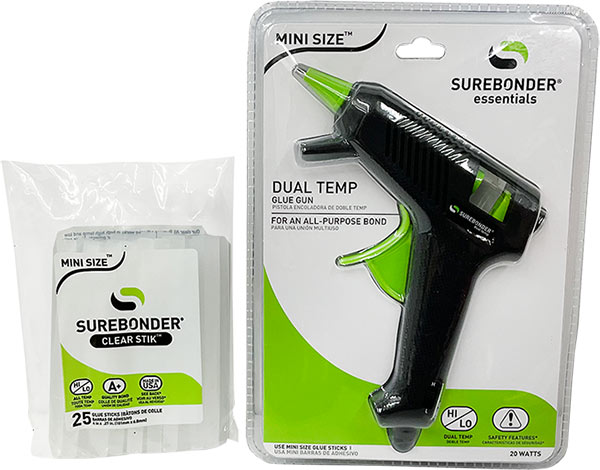
– Hot Glue & Hot Glue Gun
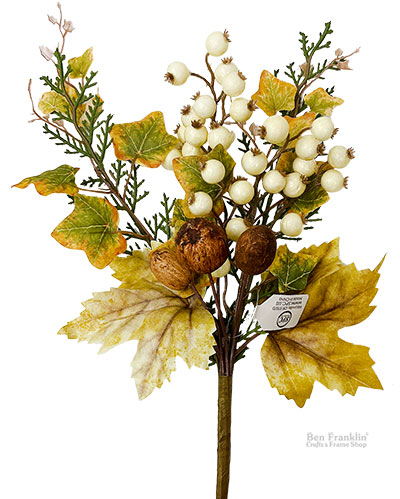
– Floral Pick (your choice)
Watch this Shorts YouTube video for basic instructions on how to make the Macramé Pumpkins. Click HERE.
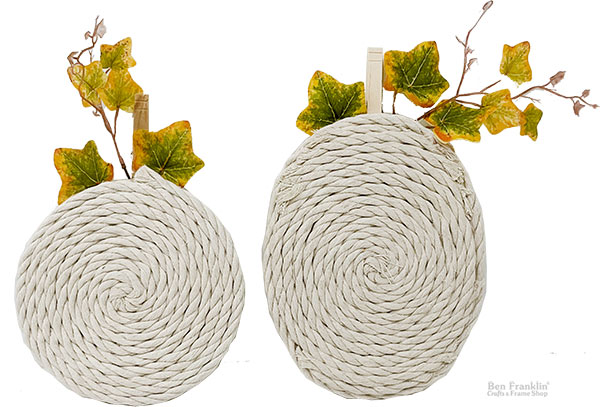
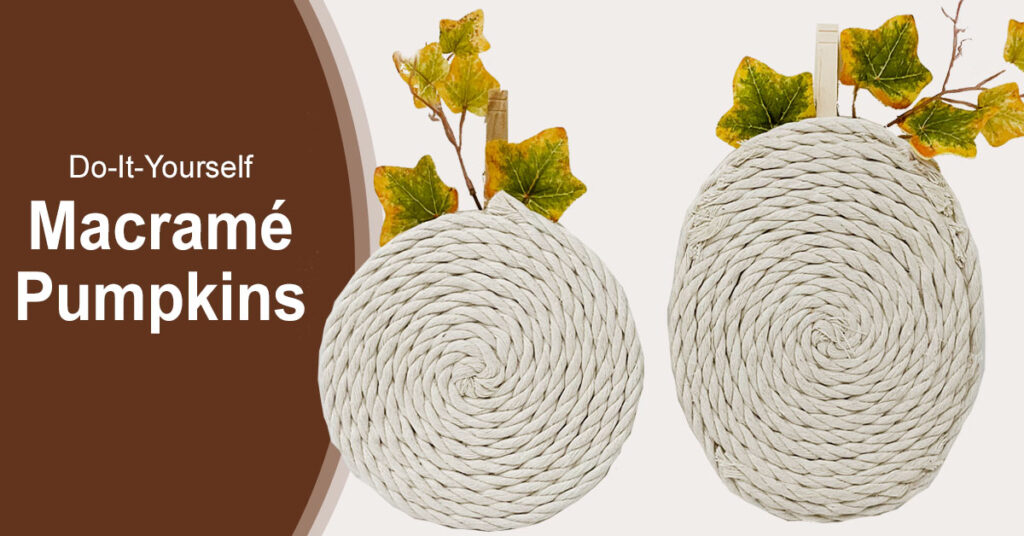
To begin your macramé pumpkin, take the end of your rope and start rolling it into a small disk shape. Aim for a diameter of around 1 inch. This initial disk will serve as the core of your pumpkin.
Apply a small amount of hot glue to the center of the unfinished wood surface. Gently press the flat side of your rope disk onto the glue, ensuring it’s centered and secure.
Now, it’s time to create the textured body of your macramé pumpkin. Apply a bit of hot glue to the wood surface where you’ll place your rope and begin winding it in circles. Keep adding glue and wrapping the rope in a circular motion, layer by layer, until you reach the outer edge of the wood surface. This will form the body of your pumpkin.
For a rustic touch, glue a clothespin to the back of the wood surface. This will serve as both a decorative element and a practical way to attach the floral pick securely using the clothespin, allowing it to extend elegantly above the pumpkin. This adds a pop of color and a touch of nature’s beauty to your macramé pumpkin creation.
With these simple steps and a bit of artistic flair, you’ll have a stunning macramé pumpkin that’s perfect for adorning your mantel, dining table, or any cozy nook in your home. The best part? You crafted it yourself with a little guidance from our Ben Franklin Crafts and Frame Shop team.
At our stores in Bonney Lake and Monroe, WA, we’re committed to providing top-notch customer service and supplying you with high-quality crafting materials. Whether you’re an experienced crafter or just getting started, we’re here to assist you every step of the way. So, gather your supplies and let your creativity flow this fall season!
Don’t forget to save this inspiring project for later by pinning it to your Pinterest board!
To get started on this macramé pumpkin project and explore a wide array of crafting possibilities, visit our Ben Franklin Crafts and Frame Shop stores in Bonney Lake and Monroe, WA. Let’s make this fall a season of creativity, inspiration, and beautifully crafted memories.


Huge savings offered throughout both our Bonney Lake and Monroe stores.