Everything you need to start paint pouring with confidence.
Paint pouring is one of the easiest and most satisfying ways to create abstract art – no experience required. This beginner-friendly technique lets color and movement do the work for you.
In this tutorial, we’ll show you how to create a stunning paint poured design on a wood surface, plus share helpful tips to avoid common mistakes and get the best results. Every piece turns out completely unique, making this a fun project for individuals, families, or a creative day with friends.
▶️ Prefer to follow along visually? Scroll down to watch our short step-by-step video tutorial.

(Supplies may vary by store, however, special store-to-store orders can be placed with a one-week turnaround. Substitutions will be suggested if a product is no longer available.)
Why You’ll Love Paint Pouring
- No artistic experience needed
- Relaxing and low-pressure
- Great for all ages
- Every project turns out one-of-a-kind
- Endless color combinations to try
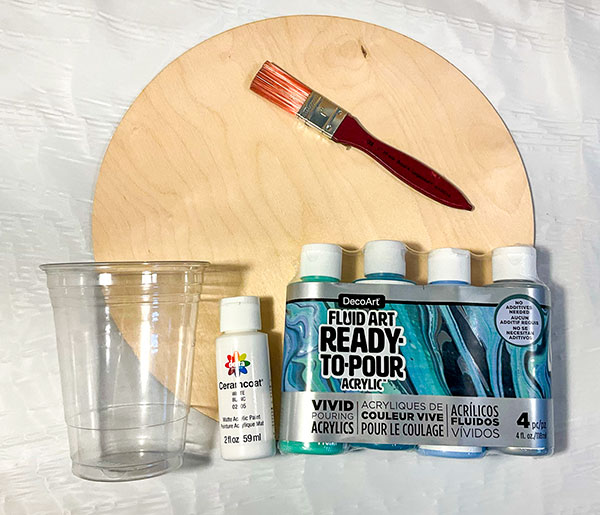
Supplies You’ll Need
- Disposable tablecloth (to protect your workspace)
- Plastic cup
- Wood or canvas surface
- Acrylic paint (*ready-to-pour OR regular acrylic)
- Paint Medium (if using regular acrylic paint)
- White acrylic paint
- Paint brush
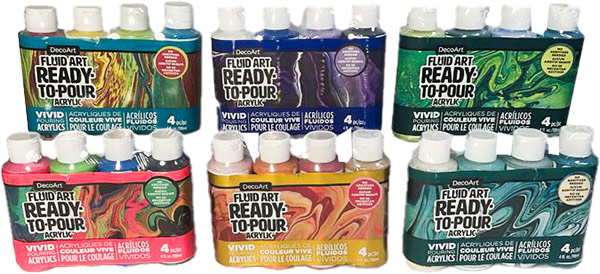
💡 Beginner tip: *Ready-to-pour paint kits make this especially easy because the consistency is already perfect. (Available at our Monroe location only)
👉 Our Monroe location carries convenient 4-bottle paint pour kits, ready to use right out of the bottle.
👉 At our Bonney Lake location, you’ll find a wide selection of acrylic paints that can also be used for paint pouring with a little simple prep.
Not sure what to choose? Our team is always happy to help you pick out colors and supplies that will give you great results.
🎨 Step 1: Prep Your Surface & Paint
Use white paint and a brush to fully cover one side of your surface.
💡 Beginner tip: Apply a thick, even coat. This helps the poured colors glide and blend smoothly.
Set your surface aside, but do not let it dry.
Option #1: How to Mix Acrylic Paint for Pouring (Beginner-Friendly)
If you’re using regular acrylic paint instead of a ready-to-pour kit, you’ll need to thin it to the right consistency so it flows smoothly across your surface.
What You’ll Need:
- Acrylic paint
- Pouring medium or water
- Mixing cup
- Stir stick
Simple Mixing Method:
- Pour your acrylic paint into a cup.
- Add a pouring medium (recommended) or a small amount of water.
- Stir slowly until the mixture is smooth and fully combined.
How to Know It’s Ready:
Your paint should have a fluid, pourable consistency – similar to warm honey or heavy cream. When you lift your stir stick, the paint should flow off in a steady stream (not clumpy or globby).
💡 Beginner tip: If the paint is too thick, it won’t move easily when you tilt your surface. If it’s too thin, your colors may look washed out.
Helpful Tips for Best Results:
- A pouring medium gives you smoother flow and better color separation
- Add liquid slowly – you can always thin more, but you can’t thicken it back easily
- Mix each color separately in its own cup before layering them into your pouring cup
- Avoid over-mixing, which can create air bubbles
Option #2: Ready-To-Pour Paint
If you’re close to our Monroe location and decided to purchase read-to-pour paints, the biggest challenge will be to pick to set of colors that you love!
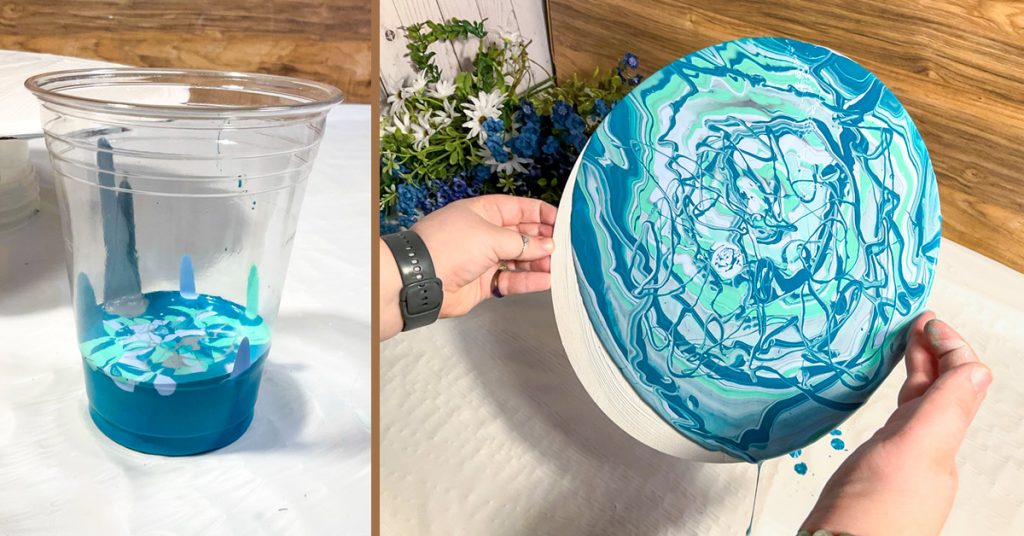
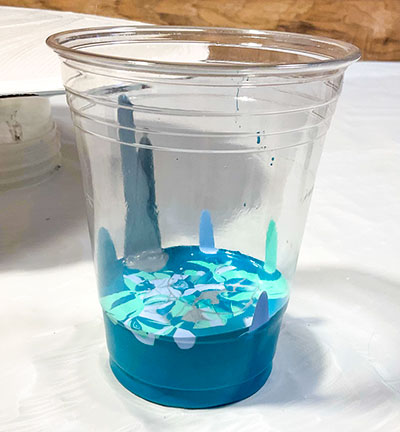
🎨 Step 2: How to Layer Your Colors
Start with one color at the bottom of the cup. Slowly add the next color by pouring it into the center of the previous layer (this helps keep colors more distinct). Continue layering colors one by one.
💡 Beginner tips:
- Use 2–4 colors for clean, vibrant designs (too many can turn muddy)
- Alternate light and dark colors for more contrast
- Add more of the colors you want to stand out, and less of the accent colors
- Metallics or white can create beautiful highlights and movement
Keep in mind: the last color you add will be the first one poured onto your surface, so plan your layers based on the look you want.
💡 Want more blended, marbled effects? Pour colors a bit faster. Want more defined ribbons of color? Pour slowly and steadily.
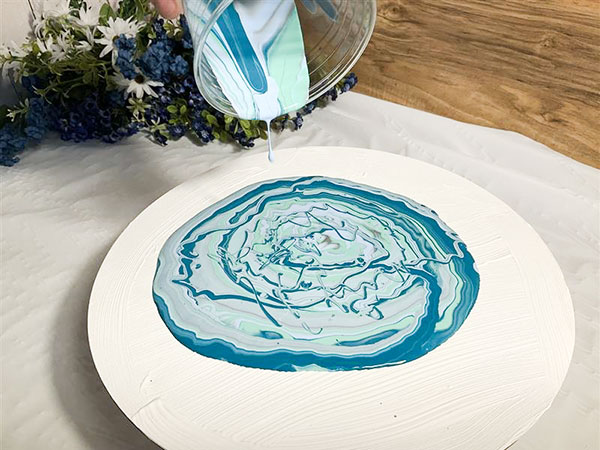
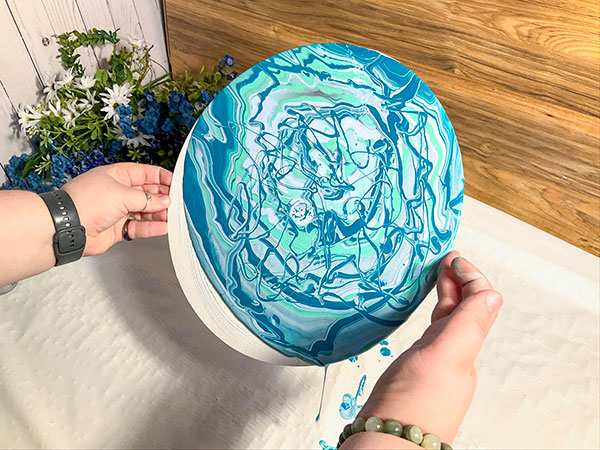
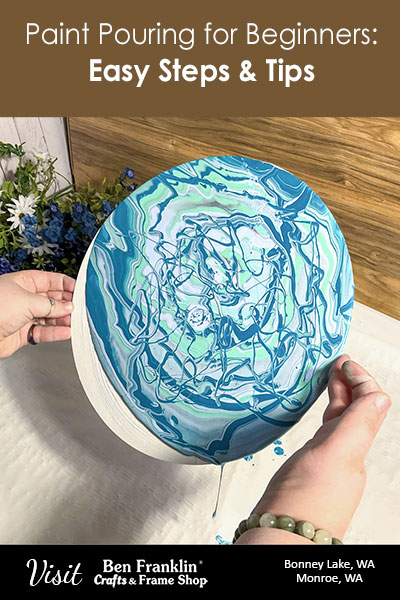
🌀 Step 3: Pour & Create Your Design
- Slowly pour the paint onto your surface. Try a circular motion starting from the center and working outward.
- Gently pick up your surface and tilt it in different directions.
- Let the paint flow naturally to cover the entire surface.
- Continue tilting until you achieve a look you love.
⚠️ Be prepared for drips – this part can get messy (in the best way!).
🕒 Step 4: Let It Dry
Set your finished piece aside and allow it to dry for up to 24 hours. Because the paint is applied thickly, it takes longer to fully cure than traditional painting.
Once dry, you’ll have a beautiful, one-of-a-kind piece ready to display in your home or give as a gift.
⚠️ Common Paint Pouring Mistakes (and How to Avoid Them)
1. Muddy Colors
Using too many colors or over-mixing can dull your design. Stick to 2–4 colors that complement each other.
2. Paint Won’t Move
Paint that’s too thick won’t flow well. Ready-to-pour kits solve this automatically, but if you’re using acrylic paint, make sure it’s properly thinned.
3. Cracking After Drying
This can happen when paint is unevenly thick. Try to tilt your surface evenly so paint spreads consistently.
4. Running Out of Paint
It’s better to have slightly more paint than you think you’ll need – especially when covering edges.
▶️ Watch the Video Tutorial
Follow along as we walk you through each step of this paint pouring project – from layering your colors to tilting your design for beautiful results.
🎨 Try These Variations
Once you’ve mastered the basics, experiment with:
- Different color palettes (neutral, bold, or metallic)
- Canvas instead of wood
- Smaller surfaces like ornaments or tiles
- Layering techniques for more intricate designs
📍 Create With Us
Whether you’re looking for ready-to-pour convenience or want to mix your own custom colors, we’ve got you covered. Our teams at both our Ben Franklin Crafts and Frame Shop locations are always happy to help you get started or answer questions along the way.
📌 PIN IT!
Don’t forget to save this blog post for later by pinning it to your Pinterest board!
🌟 Visit Us to Get Started!
Ready to start crafting? Visit Ben Franklin Crafts & Frame Shop in Bonney Lake or Monroe, WA, to find everything you need. Products may vary.