

Looking to add a touch of charm to your home decor? A DIY ribbon wreath is an excellent choice! This simple yet elegant craft project can transform any space into a welcoming haven. Plus, it’s an opportunity to unleash your artistic flair and create something beautiful with your own two hands.
(Supplies may vary by store, however, special store-to-store orders can be placed with a one-week turnaround. Substitutions will be suggested if a product is no longer available.)
– One metal ring
– A variety of ribbons in different styles and colors
– Scissors
Before we dive into the step-by-step guide, we’d like to invite all our craft-loving readers in Bonney Lake and Monroe, WA, to visit their local Ben Franklin Crafts and Frame Shop stores. Our stores are well-known for offering top-notch customer service and high-quality crafting supplies, including a fantastic selection of ribbons for your wreath project. Let’s get started!
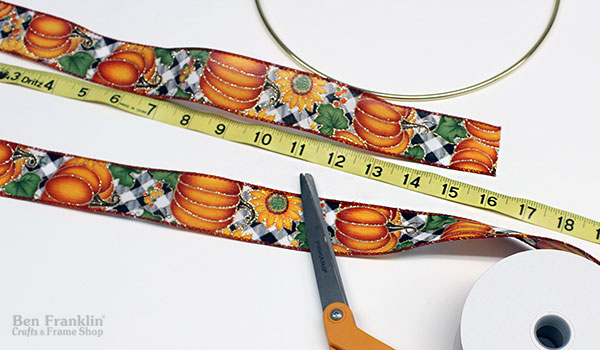
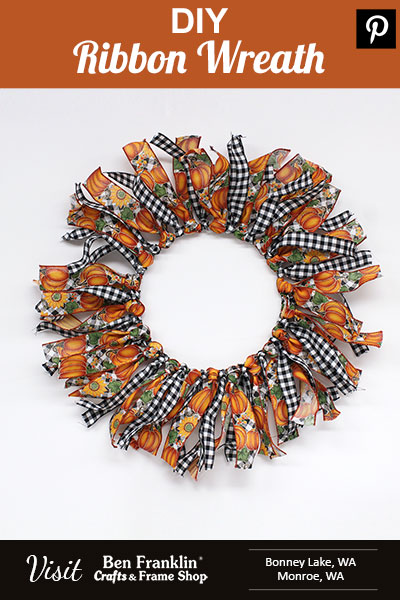
To get things started, cut a bunch of 16-inch strips of ribbon. The quantity needed will depend on how full you want your wreath to look.
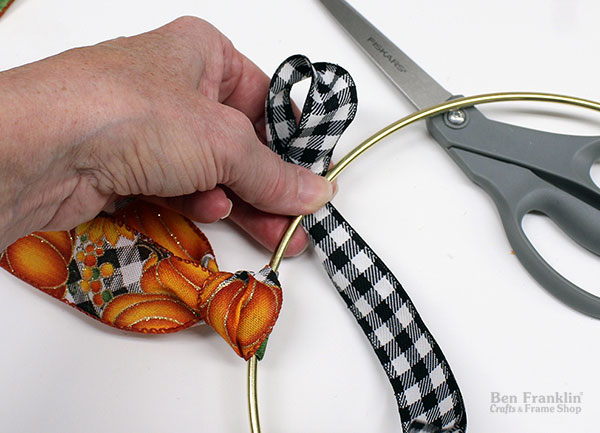
When those strips are ready, take 1 piece of ribbon and fold it in half. This will create a loop at the folded end, with two loose ends hanging down.
Take the folded end of the ribbon and loop it over the metal ring. Now, insert the loose ends of the ribbon through the loop you created and pull them through. As you do this, make sure to tighten the knot around the ring, ensuring it’s snug but not overly tight. This will keep your ribbon in place.
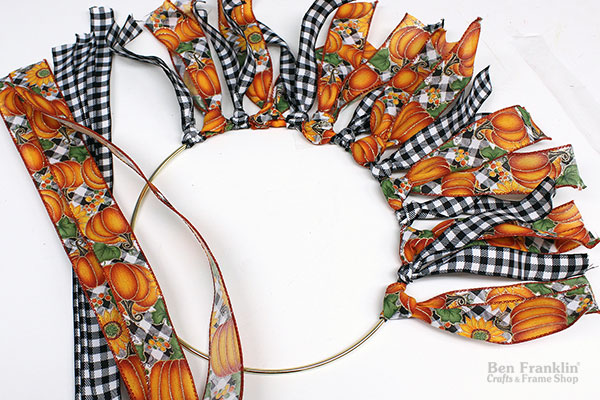
Now comes the fun part! Alternate between different ribbon styles as you continue to loop and secure them to the metal ring. You can choose a color scheme or mix and match to your heart’s content. The goal is to fill the entire ring with these beautifully knotted ribbons.
As you work your way around the ring, be sure to adjust the knots and spacing as needed. You want the ribbons to be evenly distributed and create a lush, full wreath.
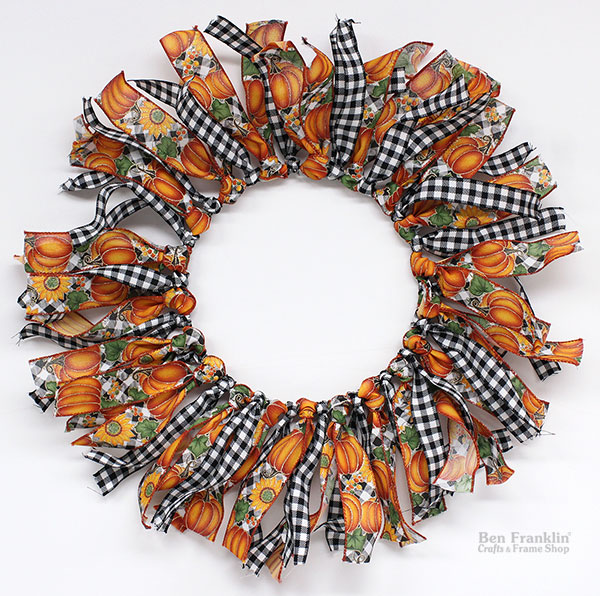
Once you’ve covered the entire metal ring with ribbons, step back and admire your handiwork. You can trim any excess ribbon if necessary and make sure the wreath looks just the way you envisioned it.
Remember, you can find a wide variety of ribbons and all the crafting supplies you need at our Ben Franklin Crafts and Frame Shop stores in Bonney Lake and Monroe, WA. Visit us today to experience the excellent customer service that sets us apart. Your crafting journey begins here, and we can’t wait to see your beautiful ribbon wreath creations!
Don’t forget to save this easy project for later by pinning it to your Pinterest board!


Huge savings offered throughout both our Bonney Lake and Monroe stores.