Step into the enchanting world of Renaissance Faires with these 3 DIY Ren Faire Headwear Ideas that you made yourself! Below, we will show you how to make a bird nest headband adorned with lifelike flowers, birds, and bird eggs. We’ll also show you how to make a mushroom crown and tulip hat. These whimsical accessories will transport you to a bygone era while adding a touch of nature’s beauty to your outfit. You will surely turn heads at any event.

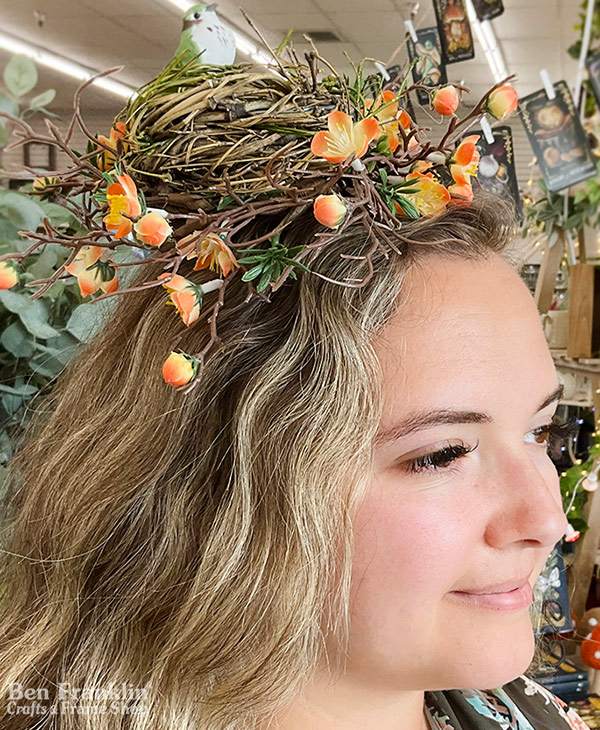
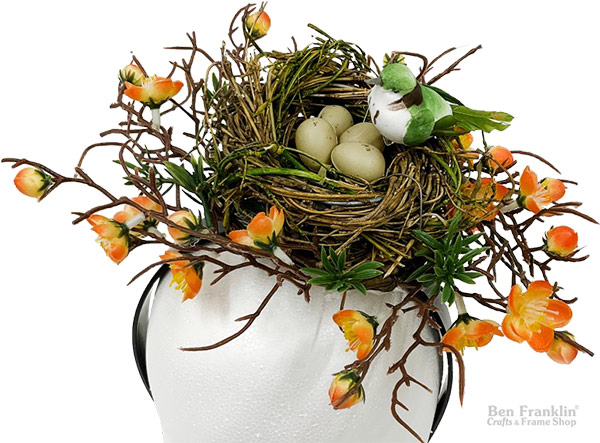
DIY Ren Faire Bird Nest Headband:
(Supplies may vary by store, however, special store-to-store orders can be placed with a one-week turnaround. Substitutions will be suggested if a product is no longer available.)
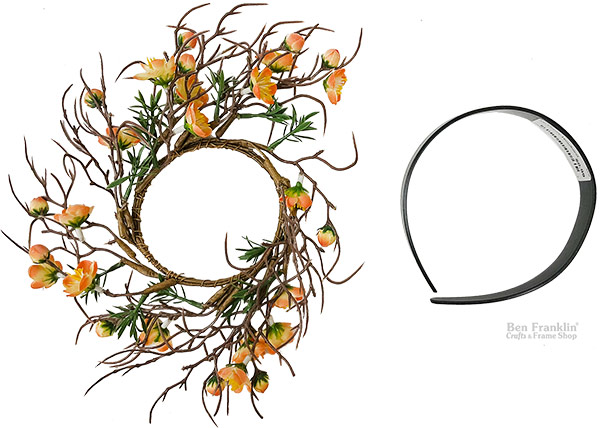
Supplies:
A plain headband (Monroe location only)
Floral wreath (Monroe location only)
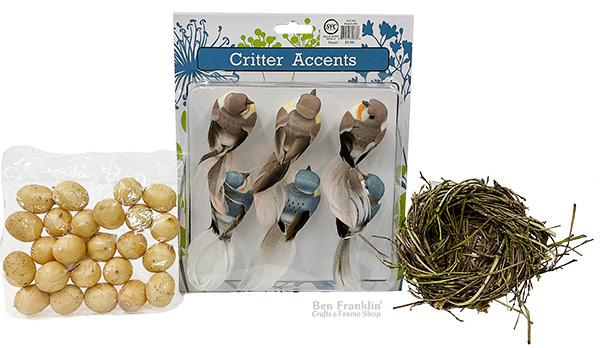
Small decorative bird figurines
Artificial bird eggs
Glue gun and glue sticks
Optional: Feathers, ribbons, or other embellishments of your choice
Step 1: Prepare Your Workspace
Before diving into the project, make sure you have a clean and well-lit workspace. Lay down some newspaper or a protective sheet to avoid any mess or damage to your working surface.
Step 2: Attach the Bird Nest to the Wreath
Using the glue gun, begin attaching the faux bird nest to the flower wreath which will be your nest base. Select flowers in vibrant colors to create a beautiful contrast against the natural tones of the nest.
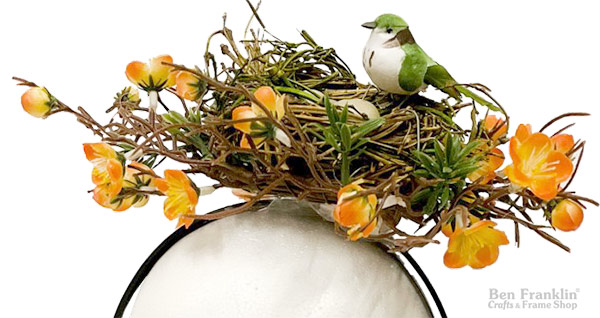
Step 3: Add the Birds and Eggs
Next, position the small decorative bird figurines onto the nest. Glue them in place, ensuring they are securely attached. Nestle the artificial bird eggs beside the birds, replicating a realistic scene. These intricate details will bring your headband to life and add a touch of whimsy.
Conclusion:
By following these straightforward steps, you can create a charming renaissance faire bird nest headband that captures the essence of nature and transports you to a world of medieval elegance. This DIY project is not only fun but also a great way to showcase your unique style at any Renaissance Faire or costume event. So, gather your materials, unleash your creativity, and enjoy the process of crafting this whimsical accessory that will surely turn heads and spark conversations wherever you go!
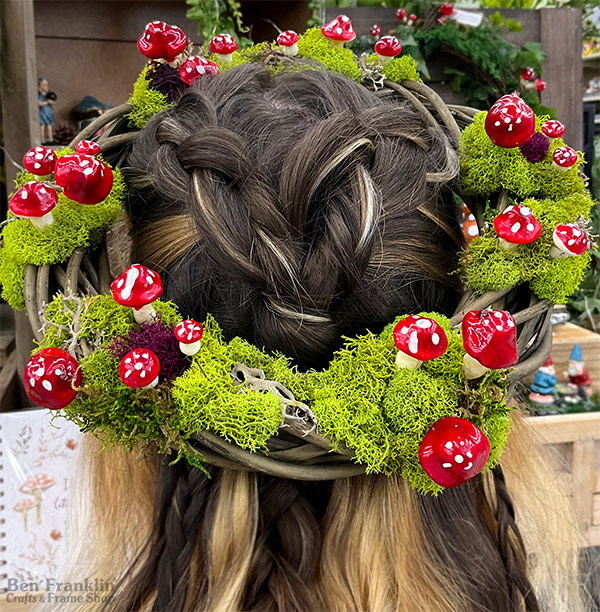
DIY Ren Faire Mushroom Crown
(Supplies may vary by store, however, special store-to-store orders can be placed with a one-week turnaround. Substitutions will be suggested if a product is no longer available.)
Supplies:
With just a few supplies and a little creativity, you can create a magical mushroom crown that will make you feel like a woodland royalty. Let’s dive into the step-by-step guide!
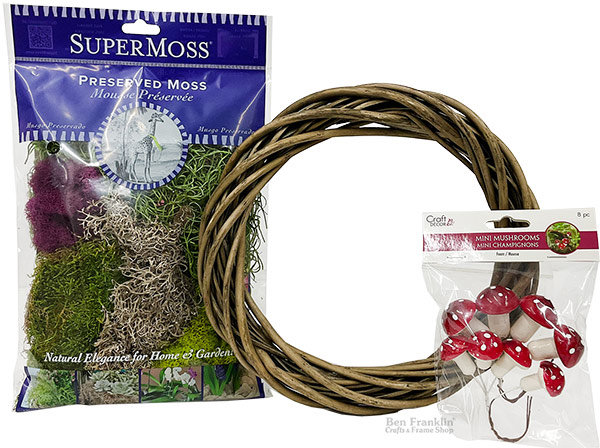
Woven wreath
SuperMoss pack
Mini foam mushrooms
Hot glue gun / hot glue
Step 1: Prepare The Wreath
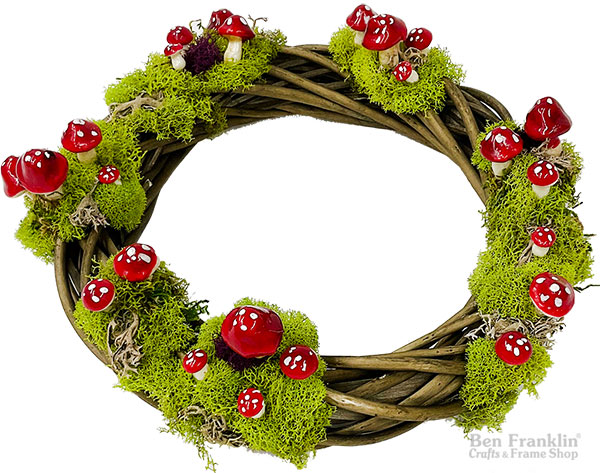
Begin by selecting the side of the wreath that will be facing up once you wear it. Using your hot glue gun, apply a desired amount of moss onto this side of the wreath. The moss will provide a lush and natural backdrop for your foam mushrooms.
Step 2: Mushroom Madness
Now it’s time to add some mushroom magic! Take your mini foam mushrooms and arrange them within the moss on your wreath. Use your creativity to position them in a way that looks organic and visually appealing. The mini mushrooms will lend an element of whimsy and fantasy to your crown.
Step 3: Let it Dry and Enjoy!
Allow the hot glue to dry completely, ensuring that the mushrooms are securely attached to the wreath. Once dry, your DIY Mushroom Crown is ready to be worn and admired! Simply place it on your head, adjust it for a comfortable fit, and let your imagination soar as you embrace your inner forest spirit.
Conclusion:
By combining a woven wreath, SuperMoss, mini foam mushrooms, and a hot glue gun, you can create a stunning DIY Mushroom Crown that will transport you to a world of whimsy and wonder. So, gather your supplies, let your creativity bloom, and prepare to be the crowned ruler of the forest!
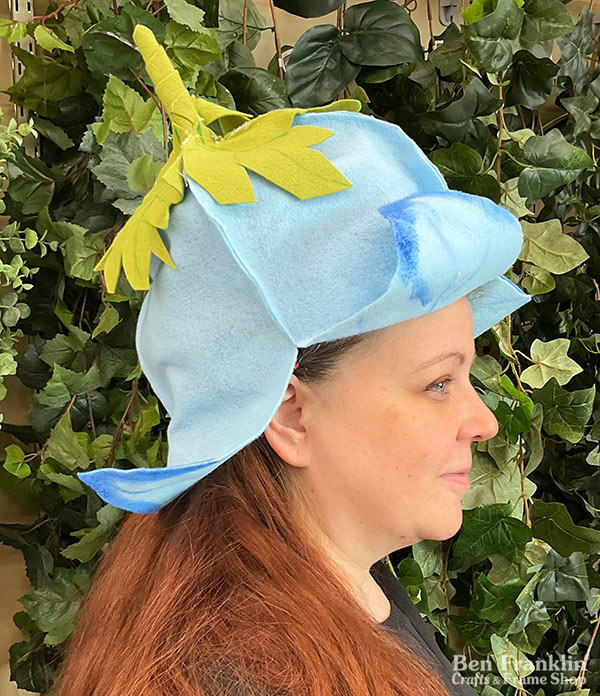
DIY Felt Tulip Hat
(Supplies may vary by store, however, special store-to-store orders can be placed with a one-week turnaround. Substitutions will be suggested if a product is no longer available.)
Supplies:
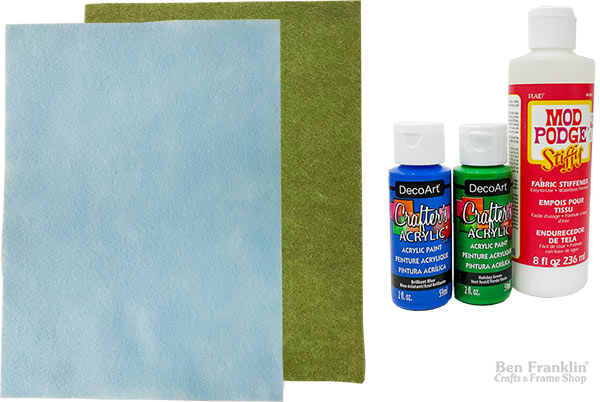
Mod Podge Stiffy Fabric Stiffener
Paintbrush
Paint tray
Hot Glue Gun & Glue Sticks
Scissors
1 sheet of green felt (you may need 2 sheets depending on the desired leaf size)
4 sheets of felt in a different color (for petals)
2 bottles of acrylic paint (choose a darker shade that complements the felt sheets)
From home: Small bucket or cylinder (to shape the hat)
Video Tutorial: Felt Tulip Hat
Step-by-Step Instructions:
Step 1: Begin by cutting the 4 sheets of colored felt into oval shapes, ensuring to keep the tip of the corners intact. These ovals will serve as the petals of your tulip.
Step 2: Next, use the green felt to cut out leaves. To maintain consistency in shape, fold the felt sheet in halves to create 2 larger leaves or quarters for 4 smaller leaves. Don’t forget to save any excess felt for later use.
Step 3: Lightly paint details and shading on each petal and leaf using the acrylic paint. This step adds depth and realism to your tulip hat.
Step 4: Grab the excess green felt and create a stem. Cut a piece of felt, roll it around a paintbrush, and secure it with hot glue.
Step 5: Use your hot glue gun to carefully glue the leaves onto the petals.
Step 6: Take the smaller leaf and glue it onto the stem. Then, attach the stem with the small leaf to the top of one of the petals.
Step 7: Proceed to glue the sides of each petal together, creating the tulip shape.
Step 8: To shape the hat, find a cylinder or small bucket. Place the hat upside down and let the bottom of the petals drape over the edge of the cylinder.
Step 9: Apply a generous amount of Mod Podge Stiffy Fabric Stiffener to the inside of the hat, either by hand or with a brush. This will help shape the bottom of the petals, allowing them to curve naturally over the cylinder’s edge.
Step 10: Finally, allow the hat to dry completely. Once it’s dry, you can proudly wear your DIY felt tulip hat and showcase your crafting prowess!
We hope that these 3 DIY Ren Faire Headwear Ideas will inspire you! We’re here to help you with all your crafting projects!