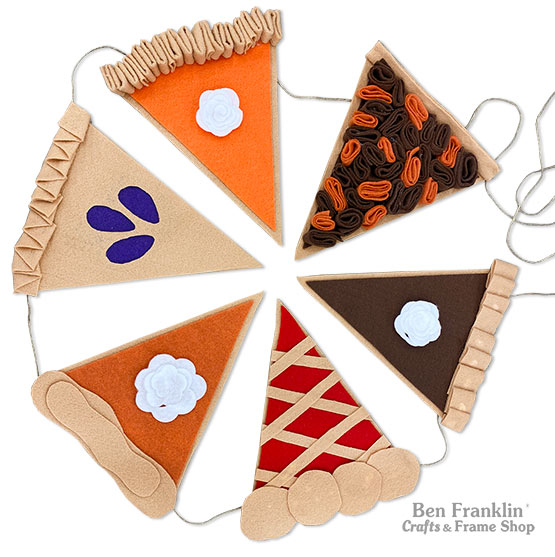


Even if you’re not skilled at making pies, you will have no trouble making these felt pie pieces using our Die Cut Machine. Then put all the layers together to make this adorable Felt Pie Banner! Perfect for the fall season!
The step-by-step instructions to make the felt pie banner are below, plus we have a short video showing you how to make a basic pie slice using our Die Cut Machine. If you’re not familiar with using our machine, check out the blog post HERE.
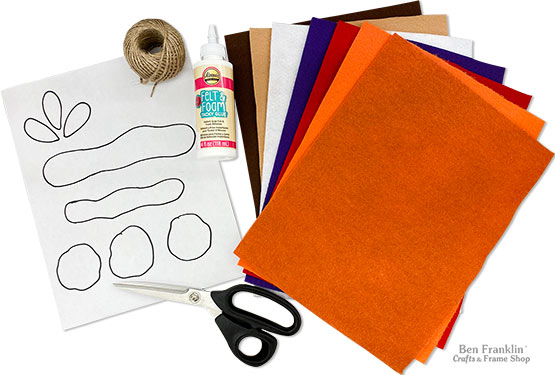
(Supplies may vary by store, however, special store-to-store orders can be placed with a one-week turnaround. Substitutions will be suggested if a product is no longer available.)
• Felt Sheets: red, orange, dark orange (x2), dark brown (x4), light brown (x8), white and purple
• Felt & Foam Tacky Glue (for kids) or hot glue/glue gun
• Crust Template Sheet (available HERE)
• Marker
• Scissors
• Jute
• Die-Cut Machine Center:
– Ben Franklin Die #R2 (in-store only) for the triangle
– Ben Franklin Die #Q20 (in-store only) flower for icing
Watch this short video for basic instructions on how to make a felt pie slice using our Die Cut Machine.
Step-by-Step Instructions:
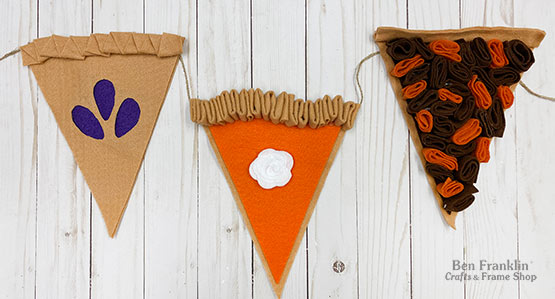
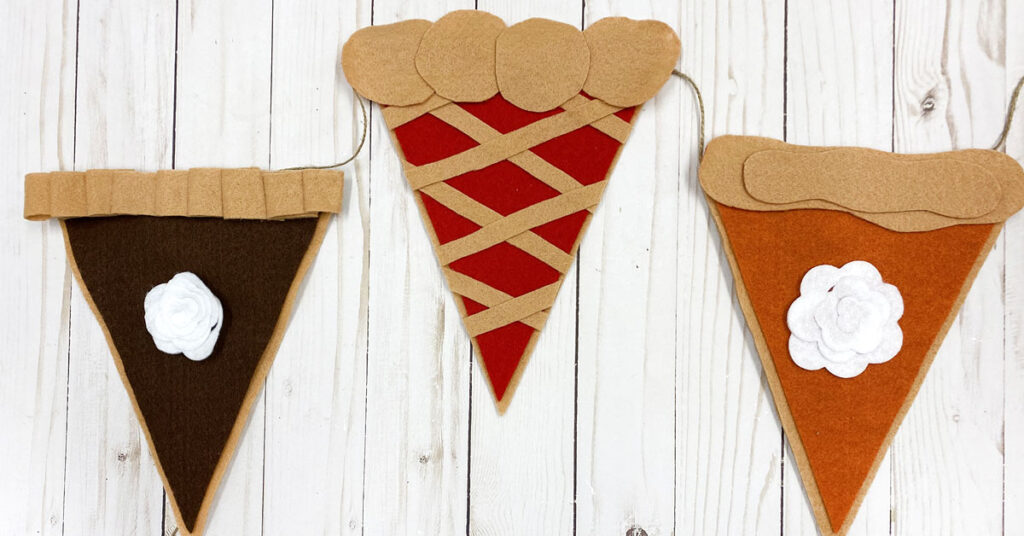
1. Cut 7 large triangles using the light brown felt and Die #R2 available at our Die Cut Center.
2. Use Die #R2 to cut a red and orange triangle, plus 1 dark orange and 2 dark brown triangles.
3. Trim ½” from the base of each triangle from step 2 only.
4. Cut 3 flowers (using for icing) from the white felt sheet using Die #Q20.
5. Roll each icing shape close together and glue the end to keep in place.
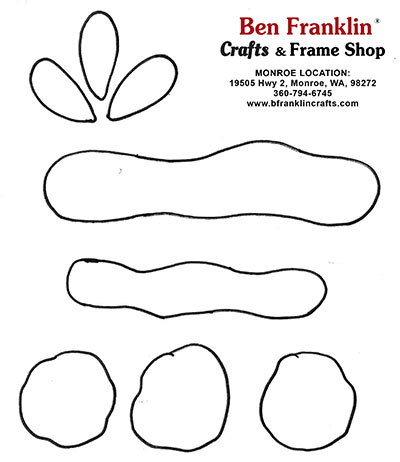
6. Use the crust template sheet to trace on the light brown felt (you can also use on scraps from step 1) and cut out. Cut out as many crust pieces as you want to use on your pies.
1. Align each base of the orange, dark orange and dark brown (1) triangle to their own light brown triangle to create the crust around the filling.
2. Glue your preferred crust to each of the pies. Glue the icing to each pie.
1. Align the base of the red triangle with a light brown triangle.
2. Cut 8 strips from a light brown felt sheet (can be from scraps as well) about a ½” wide by 7” so it can cross over the widest point of the pie.
3. Criss-cross the strips across the pie. Trim off excess from the sides. Glue on your preferred crust
1. Cut the 3 pear shapes from the crust template sheet.
2. Use the pear shapes to trace on 1 light brown triangle, then cut out.
3. Cut out a circle from the purple felt sheet wide enough to fit behind the 3 pear shapes from step 2.
4. Glue the purple circle to the back of the triangle from step 2.
5. Then glue another light brown triangle to the very back to secure the purple circle.
6. Glue on your preferred crust.
1. Align the base of a dark brown triangle with a light brown triangle and glue together.
2. Glue on your preferred crust.
3. Cut multiple strips of dark orange felt and dark brown felt (also use from scraps) about 1” wide – length can vary.
4. Roll each strip in an oval shape and glue to secure.
5. Next glue each oval shape on top of the dark brown triangle.
1. Space each pie 3″-4” apart from each other.
2. Cut the desired length of jute. Glue jute to the back of each pie. For extra strength, glue a strip of felt over the top of the jute. Let dry and hang!